Artistry in Concrete: Stencil Techniques for Captivating Designs
By Justin Richardson
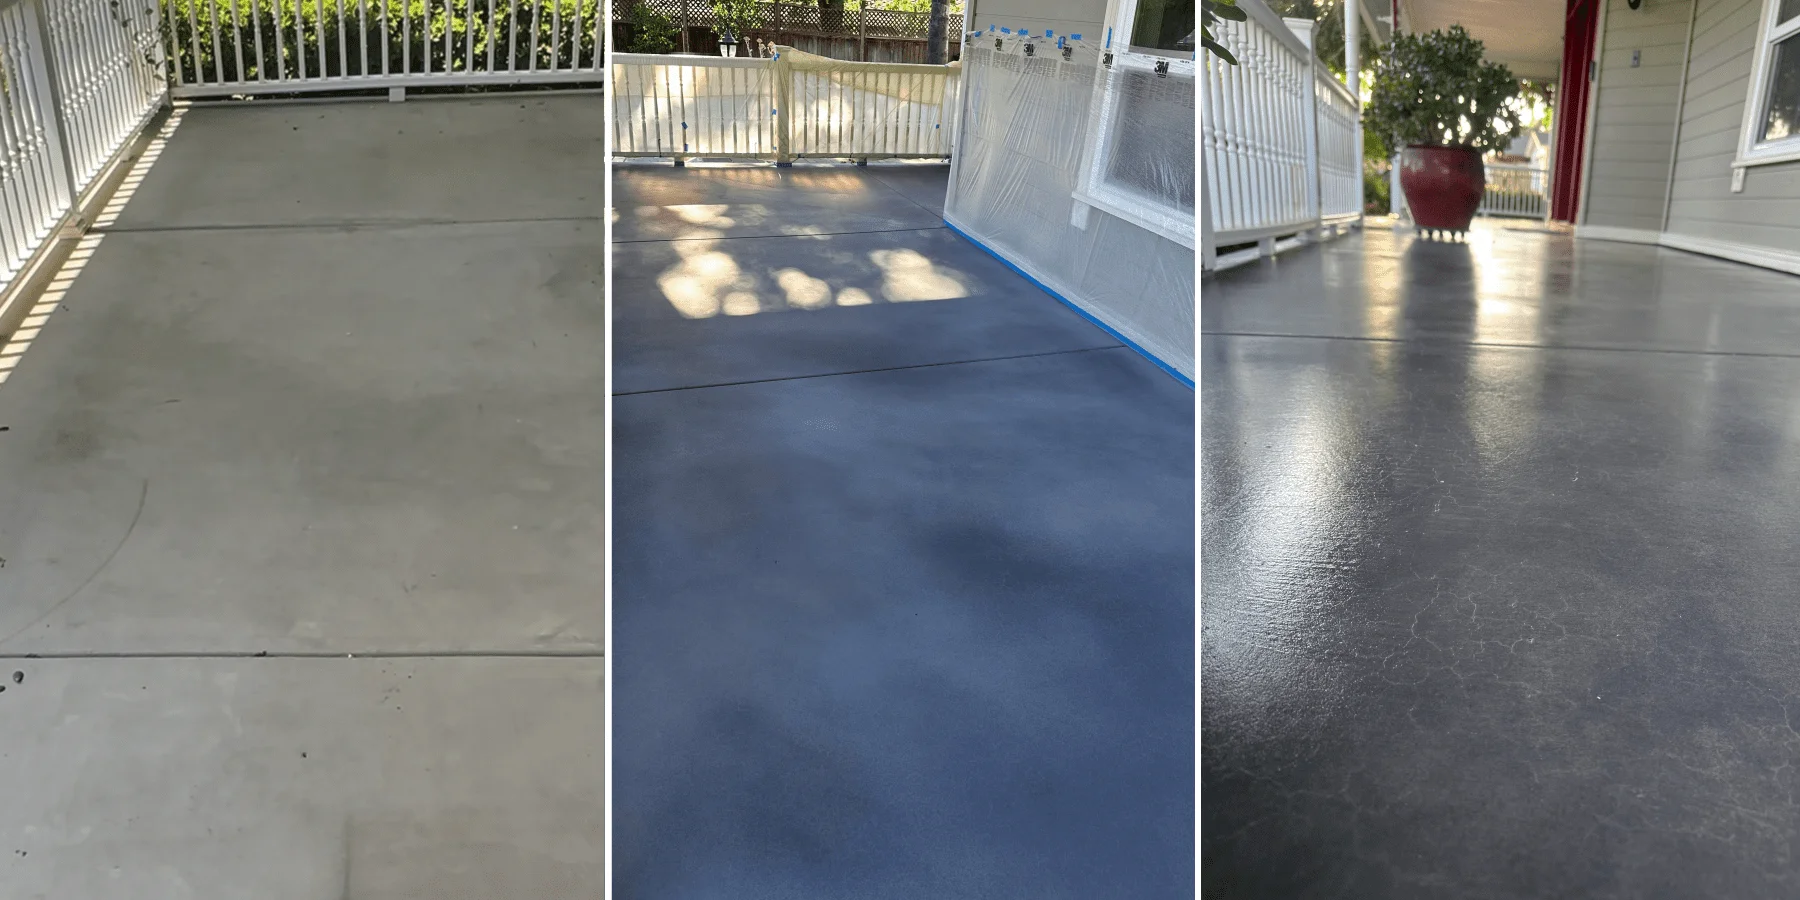
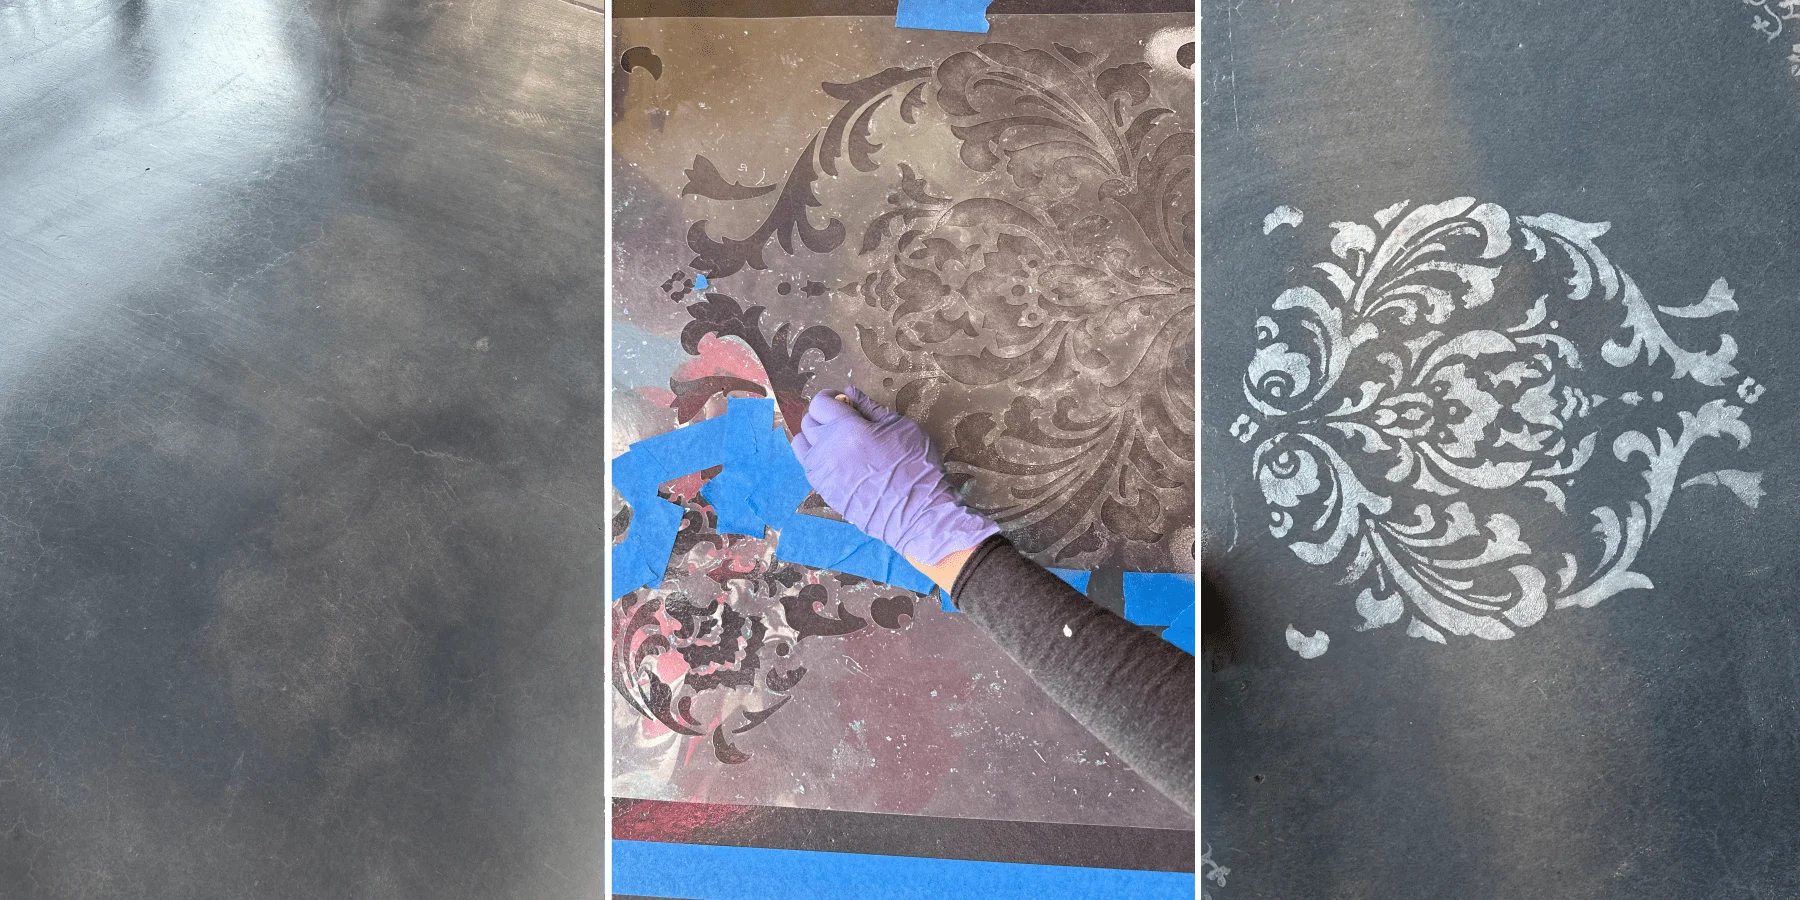
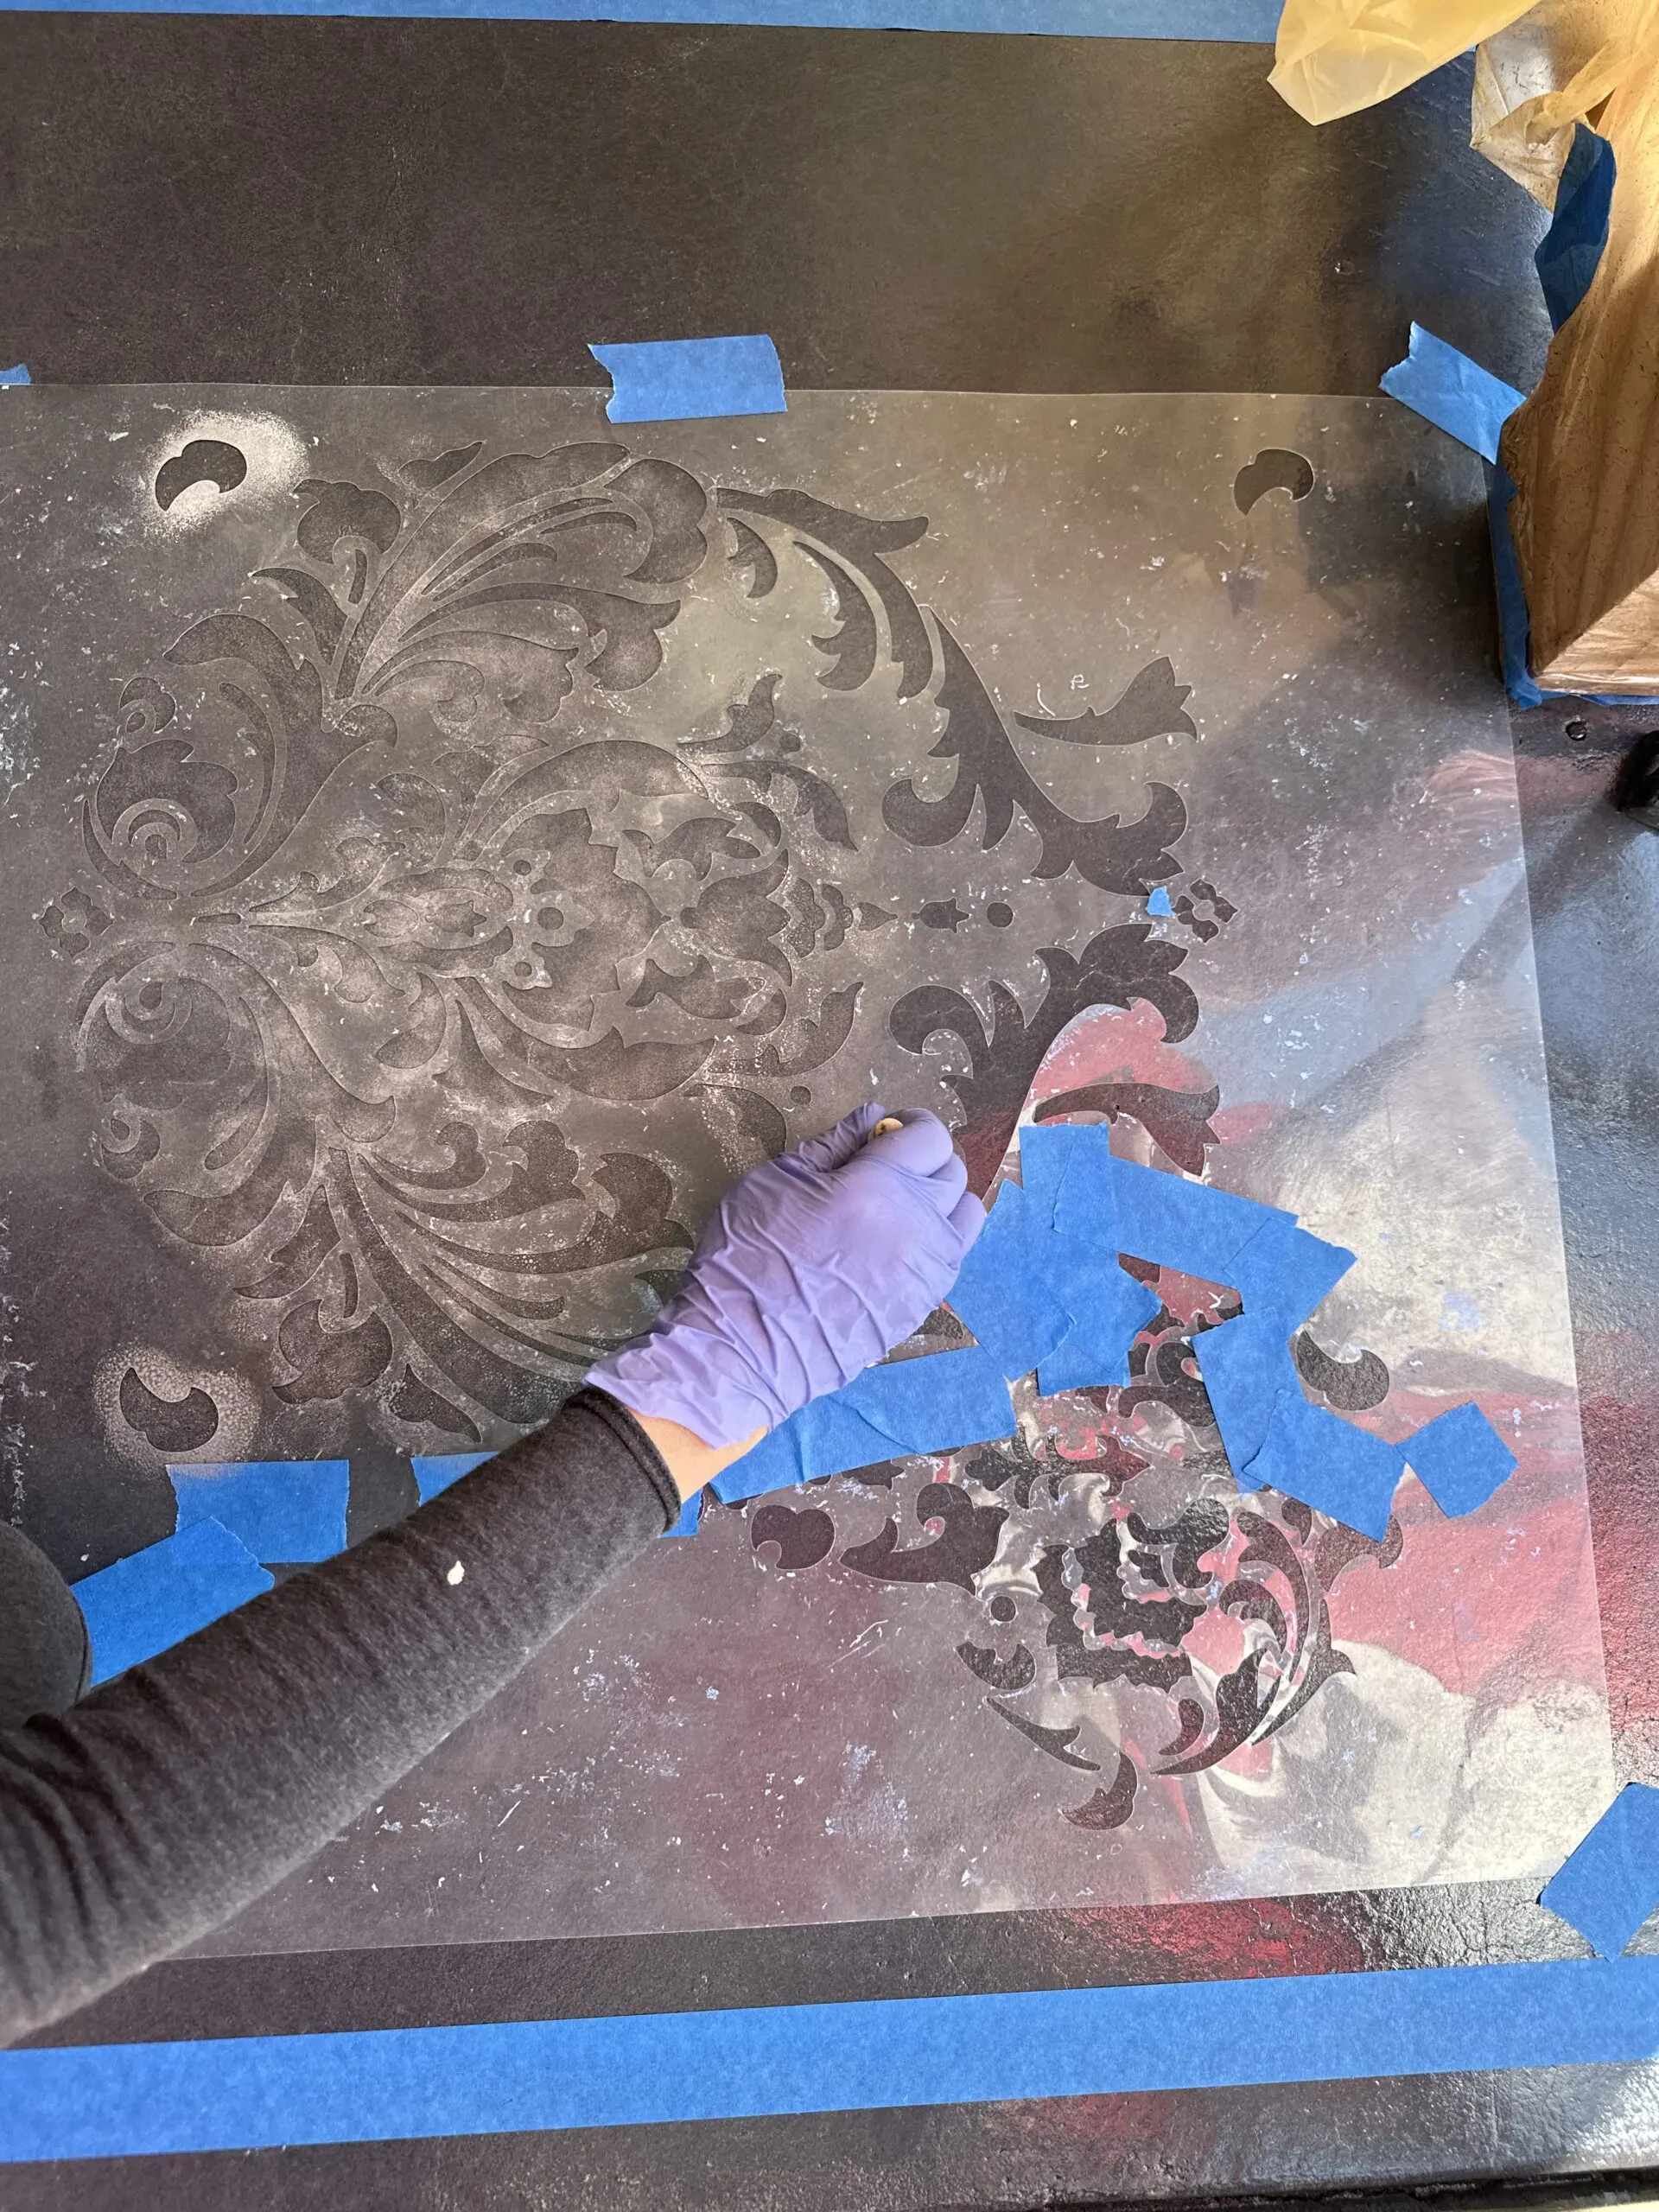
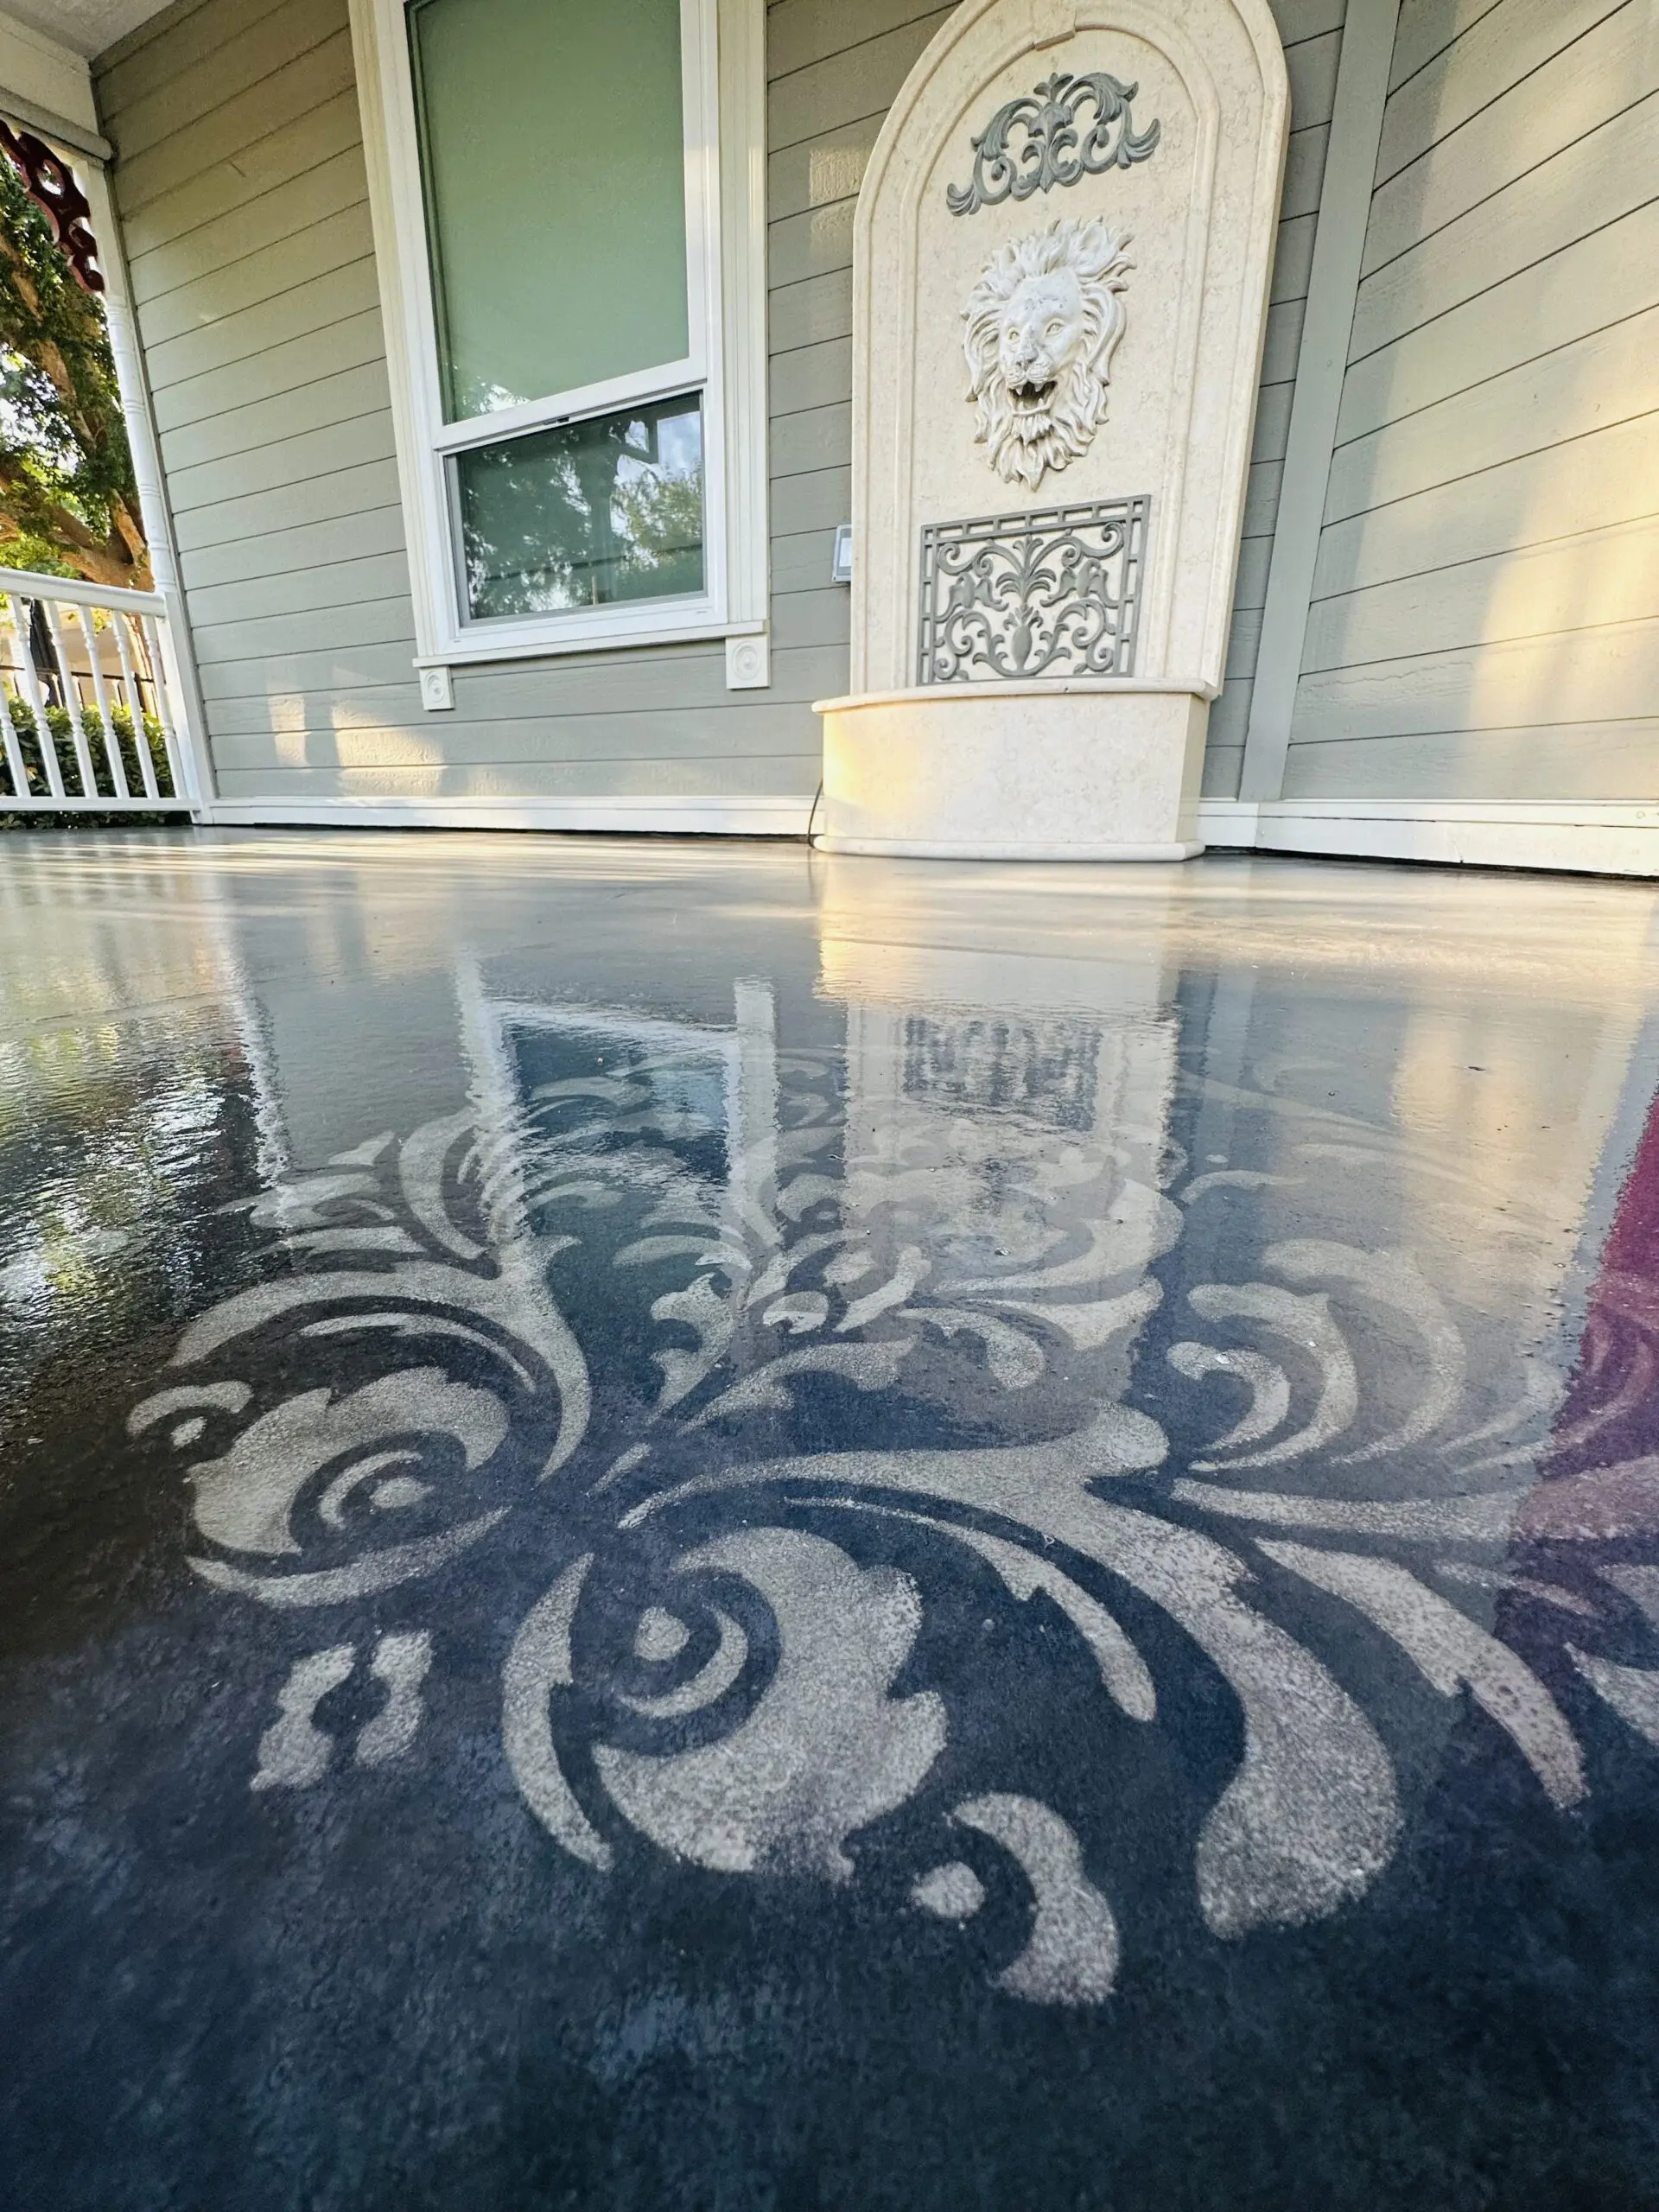
This customer’s DIY project transformed their dated 1980s patio into a marble-effect masterpiece using Direct Color Antiquing™ stains and precise stenciling. Starting with a deep clean, they applied a base of Gray Antiquing™ Stain, followed by Light Charcoal and Silver Gray stains for depth and natural marble look. The project was sealed with EasySeal™ Gloss Concrete Sealer for durability. Unique to their Victorian home, elegant Damask stencils were added by the entrance, finished with a second sealer coat for protection and shine.
Project Info:
- Project Completed In: 14 day(s)
- Estimate of Square Footage: 650 sq. ft.
- Project Description:
We are so happy with our DIY project that transformed our old fading 1980’s patio concrete into a fabulous marble looking masterpiece by Direct Color Antiquing™ stains and stenciling. We started the project with deep clean/thorough preparation. As the first step, we sprayed Gray Antiquing™ Stain as our base color. Secondly, we highlighted the base with Light Charcoal stain, and then sprayed the Silver Gray stain over it to blend the transitions and bring a natural look. We then applied EasySeal™ Gloss Concrete Sealer. To add icing to the cake, after the first coating, we applied stencils of 2 elegant Damask patterns at each side of our entrance door to match our Victoria house style. Finally, we applied the 2nd coating of sealer for finish looking and ultimate protection. - Personal Tips:
1. Don’t use any applying methods other than spraying!
2. Use shoes covers while applying highlights and sealer, but don’t worry too much about small foot prints, they won’t be visible eventually.
3. Never apply sealer too soon after applying colors, there will be bubbles and you would have to redo it. - Direct Colors Products Used:
Antiquing™ Stain Trial Kit: Light Charcoal, Gray, Silver Gray
5 Gal. Gray Antiquing™ & EasySeal™ Gloss Kit
2 x 1 Gal. Light Charcoal Antiquing™ Stain
1 Gal. Silver Gray Antiquing™ Stain - Other Products Used:
Damask stencils kit
Smith Professional Sprayer R200
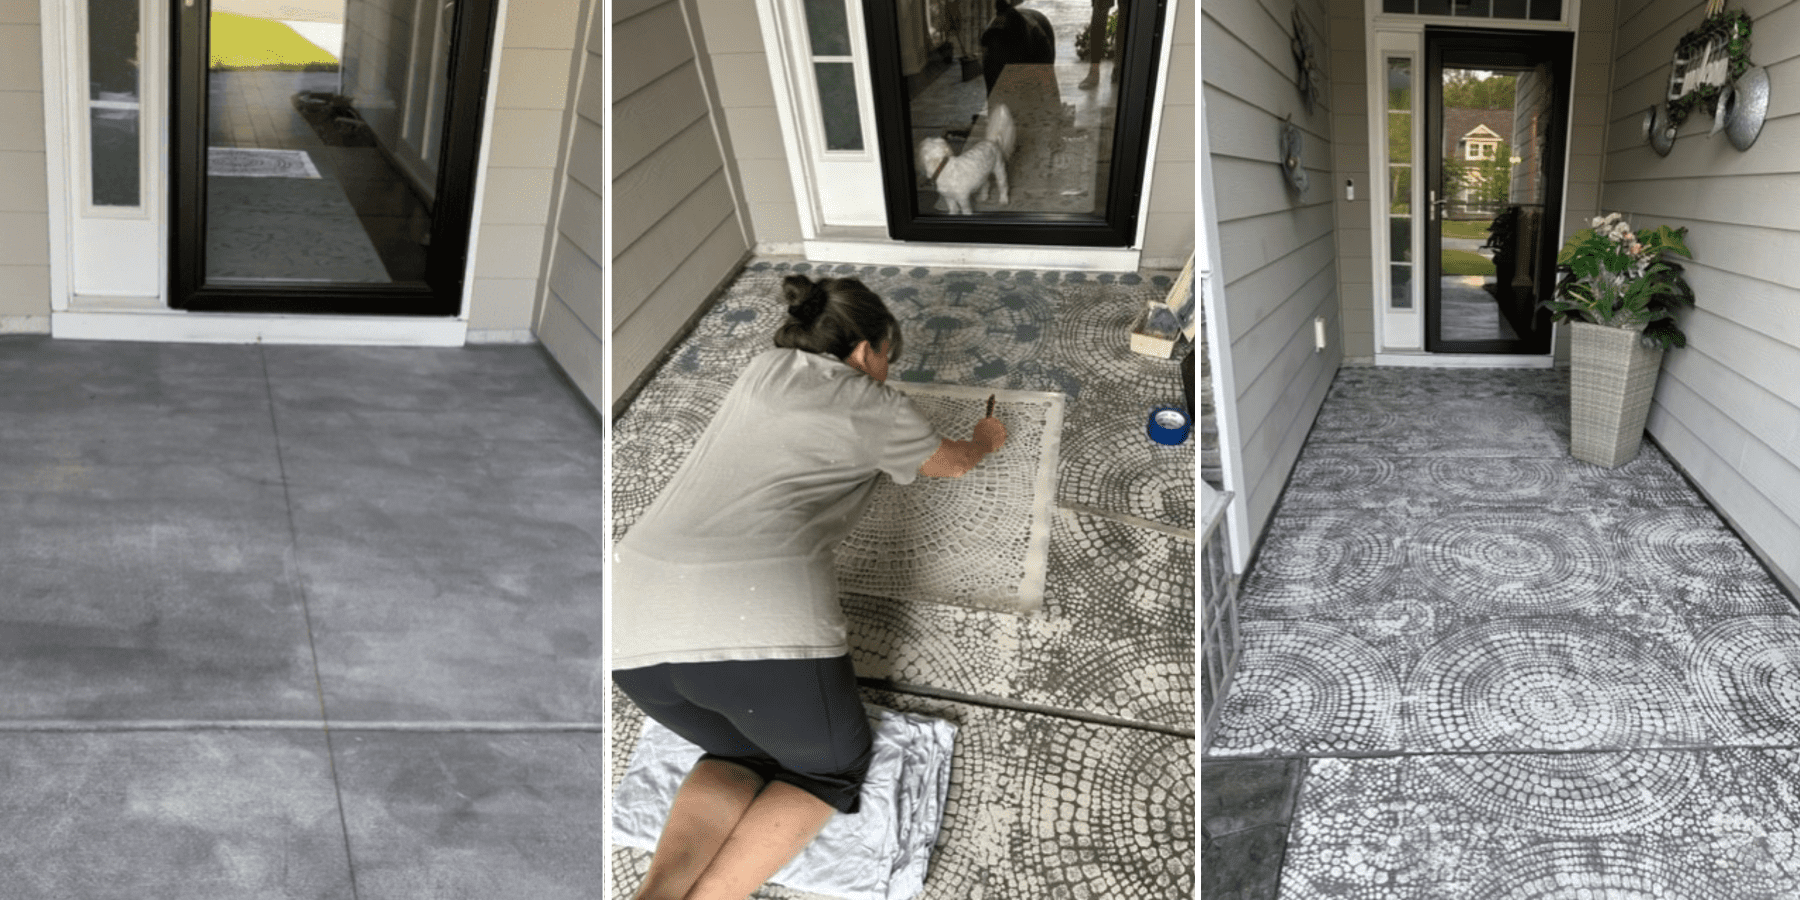
From Plain to Patterned: A front porch’s journey through a creative makeover, where meticulous stenciling turns bland concrete into a stunning tapestry of designs a Pebble Patio Stencil, making a statement entrance.
Project Info:
- Project Completed In: 4 day(s)
- Estimate of Square Footage: 650 sq. ft.
- Project Description:
We had such a great experience with your products–we were feeling so disappointed when the concrete company poured the new section of our patio and it was so mismatched! We just didn’t know what we were going to do. Luckily I spent some time on line looking for a solution and came across Direct Colors!! Then the process began with your great idea of having a little sampling package to see if it would look like we wanted it to with your stains, etc. Direct Colors products were the answer to our dilemma and it really looks great! We get constant compliments from friends, family and neighbors. Also, your customer service was a great help. Most times you’re just ‘on your own’ trying to figure things out. It was great having some guidance with our product purchases. All in all, this was a good home-owner experience! Thank you all again! - Personal Tips:
We’d advise that you do not put on the sealer in weather that is in the high 80’s or more. Unfortunately, it got into the 90’s when we were at the end of our second coat of sealing and the next day we noticed some bubbling in a couple of areas. We were able to fix them when it got cooler. - Direct Colors Products Used:
Antiquing™ Trial Kit ( Charcoal, Light Charcoal & Silver Gray)
5 Gal. Gray Antiquing™ & EasySeal™ Gloss Kit - Other Products Used:
Pebble Patio Stencil
White acrylic paint
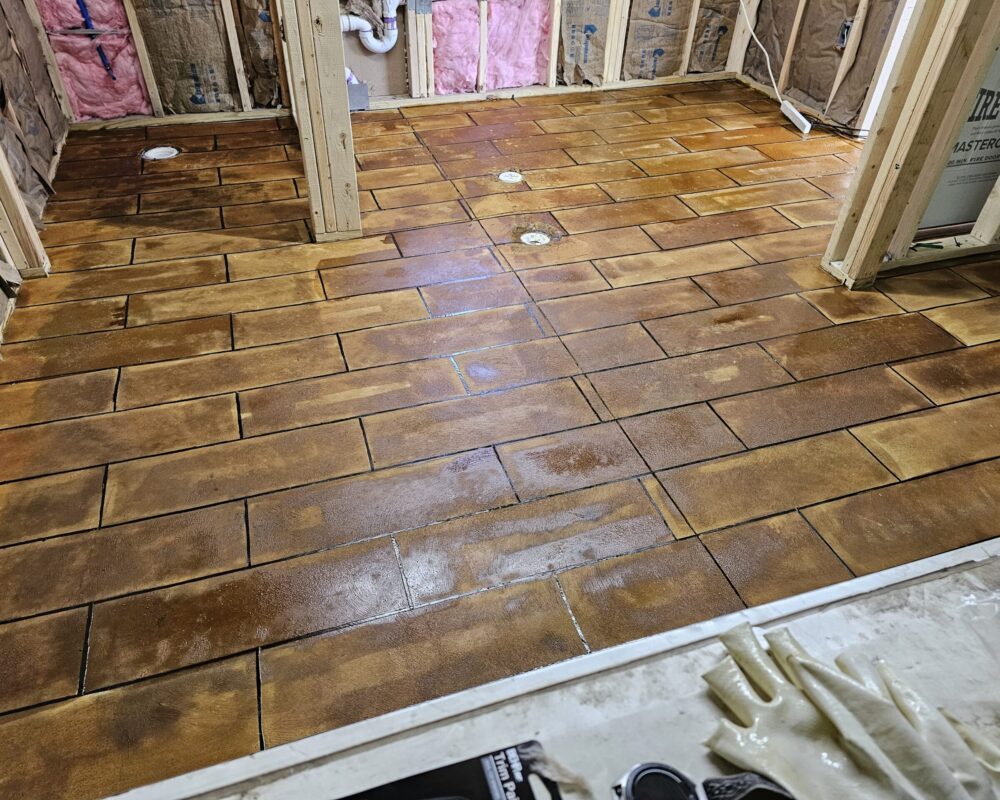
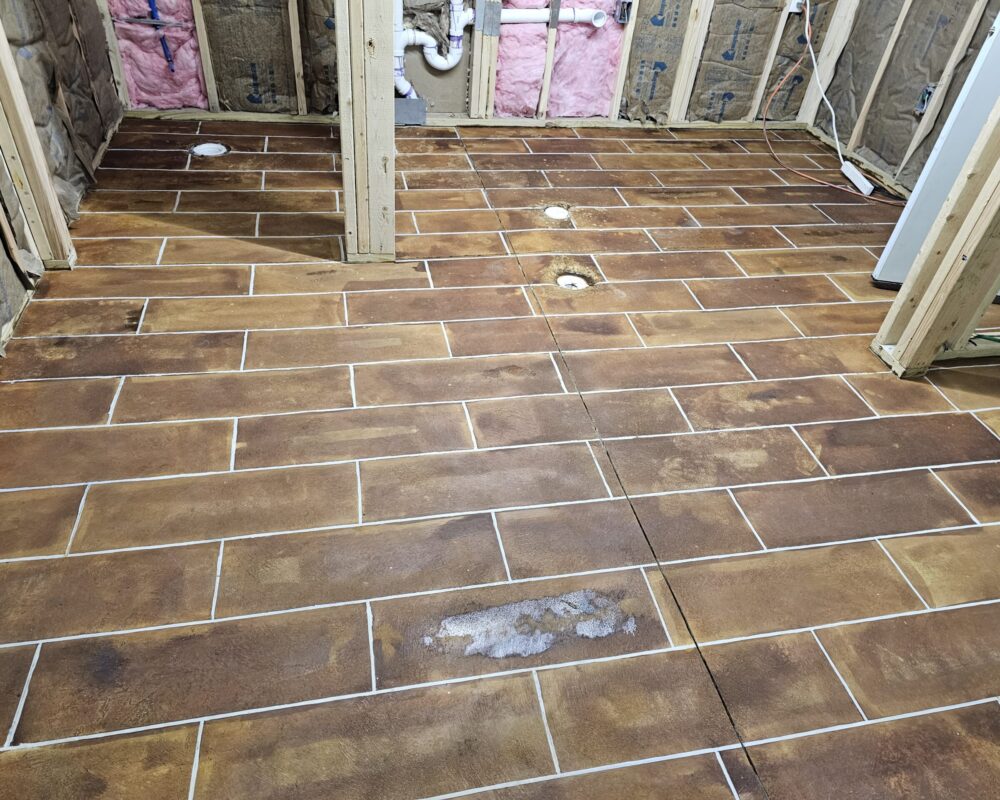
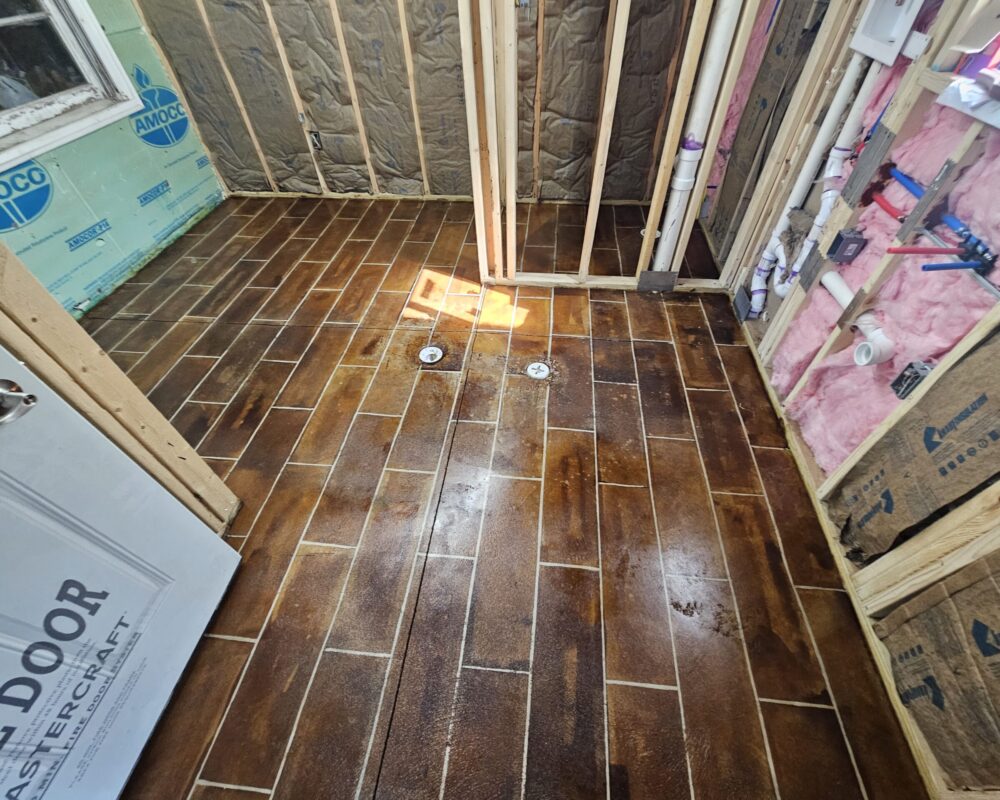
Concrete Chic: Bathroom’s Faux Wood Makeover
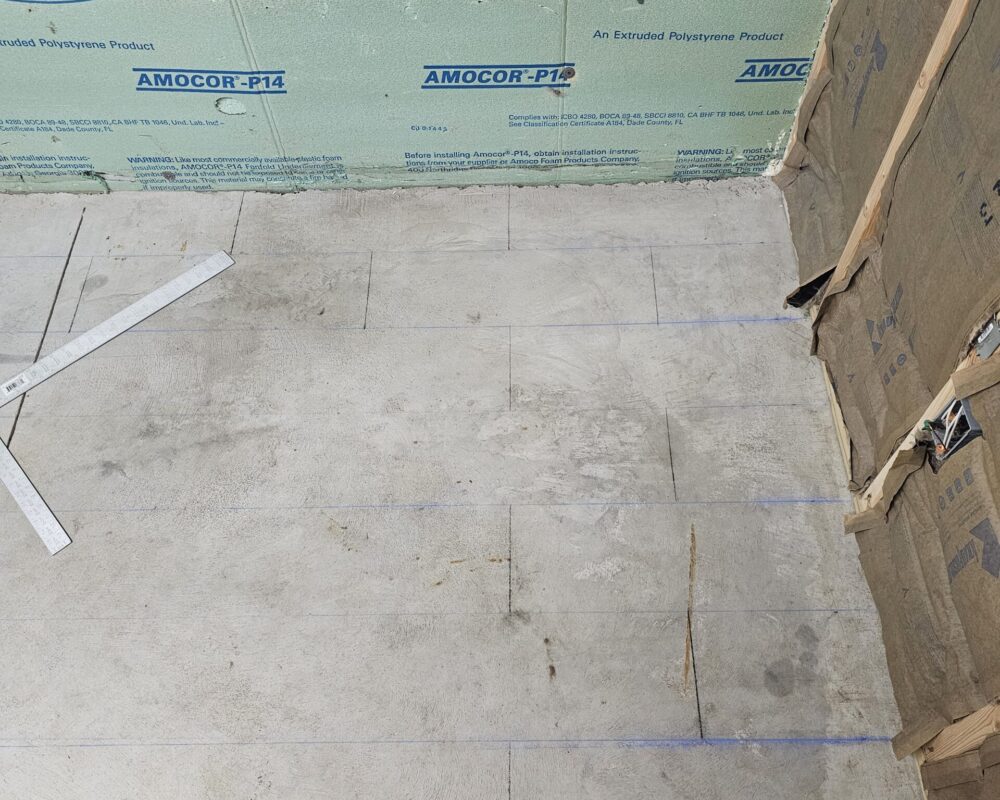
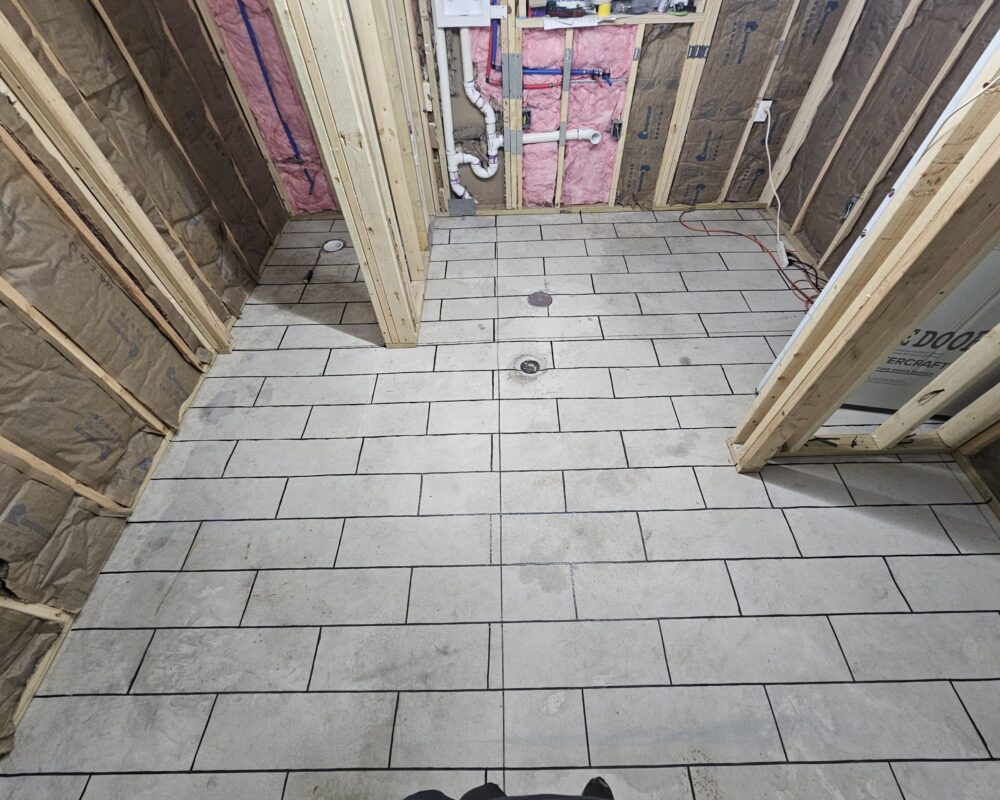
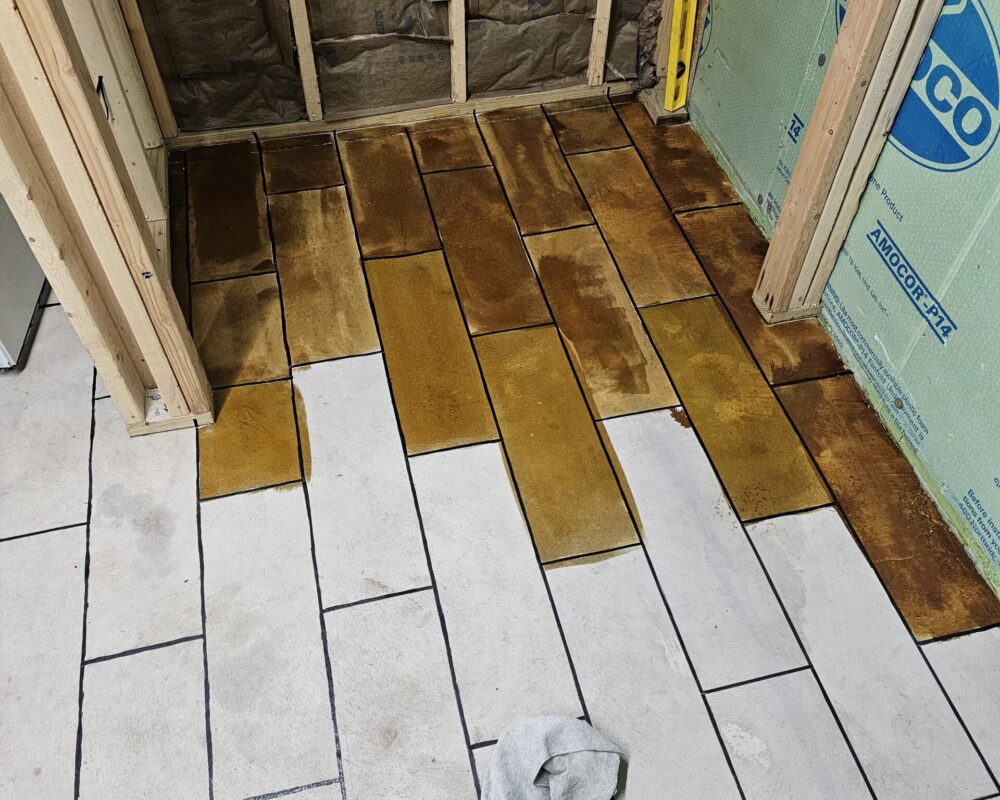
See how a bathroom floor was turned from plain concrete to stylish faux wood with Gorilla Duct Tape, and Coffee Brown ™ stain. A simple but stunning transformation!
Project Info:
- Project Completed In: 2 day(s)
- Estimate of Square Footage: 144 sq. ft.
- Project Description:
I started out consulting Ashli (my wife) on what size tile look we wanted. It was between 6×24 and 8×24, we ended up doing 8×24 so save us from having to do more lines, which brings me to the lines. Ashli and I had a science experiment with tape and which wouldn’t bleed through the stain under the tape, we tried 4 different types of tape and ended up on gorilla duct tape. I cut it down to ¼ in the best I could. I measured out and chalked lines and we laid the tape down in the tile design. I used our coffee brown stain and went to town, staying up till 1 am due to having to neutralize the acid stain and clean it. Pulling up the tape was the most satisfying part due to being able to see no bleed through and all mostly crisp lines. I decided to leave the lines the natural concrete color so it would offset the dark brown well. After the second of sealer last night I can say I’m really happy how this came out! - Personal Tips:
Test test test, use a inconspicuous area to find out if you can do what you want. Take your time, and don’t wipe with straight lines, go in circles. - Direct Colors Products Used:
1 Gal. Coffee Brown DIY EverStain™ & EasySeal™ Gloss Kit
1 Gal. ProWax Polish™ Gloss
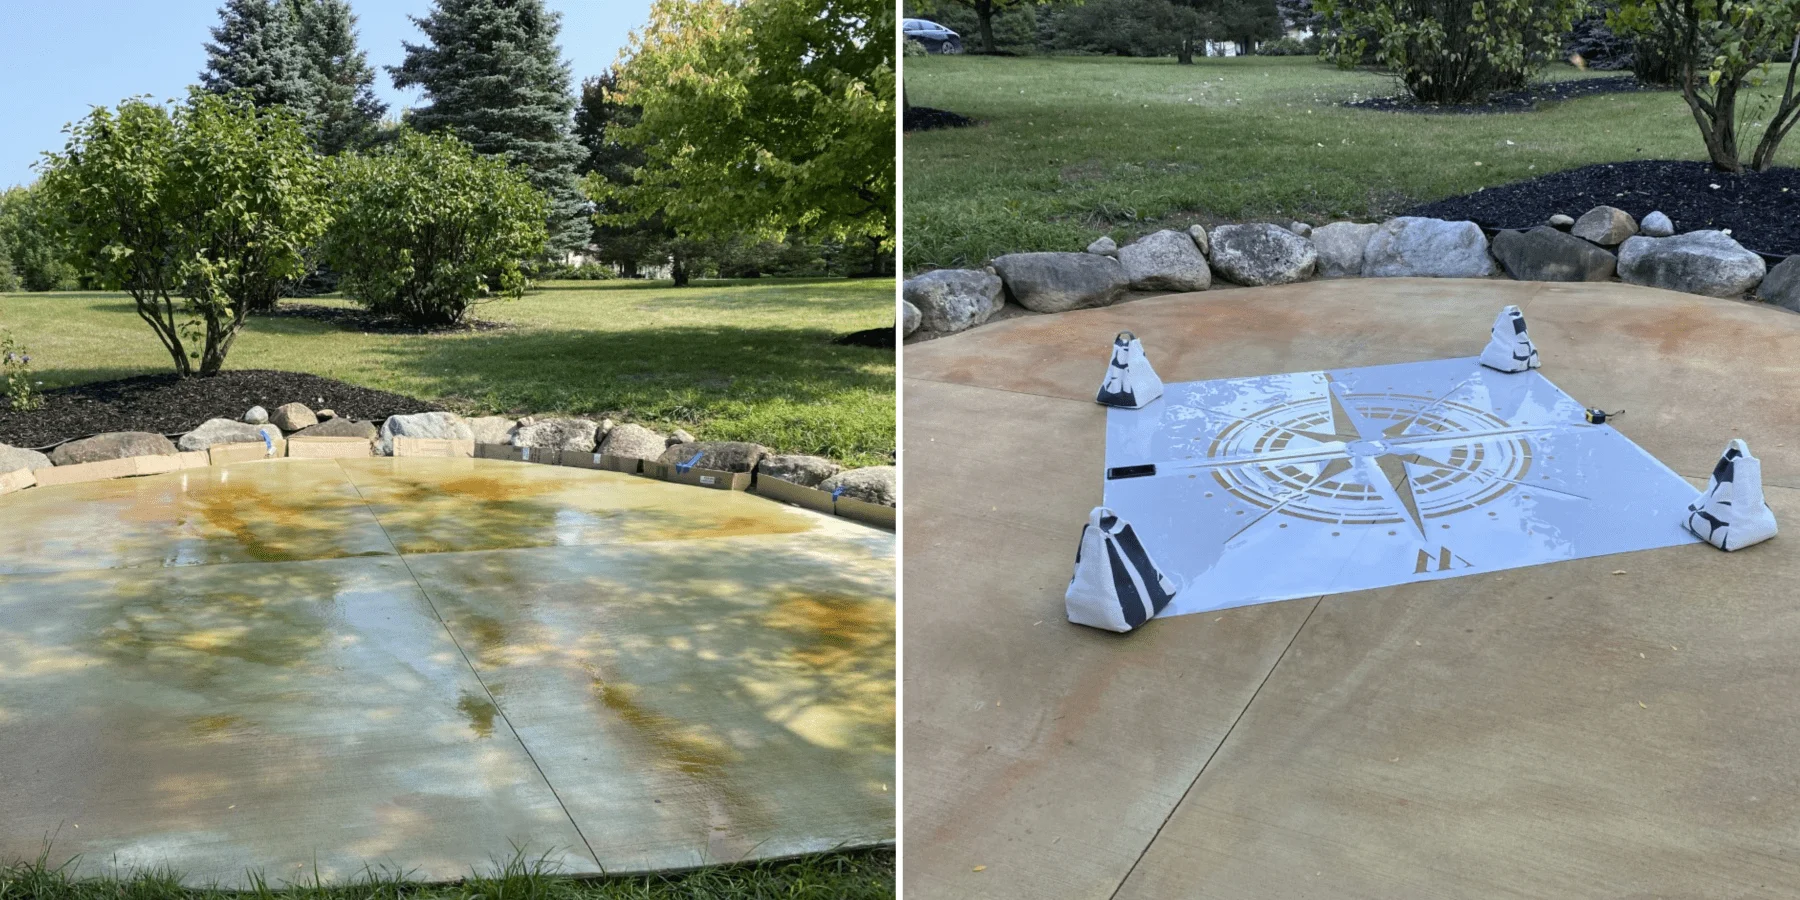
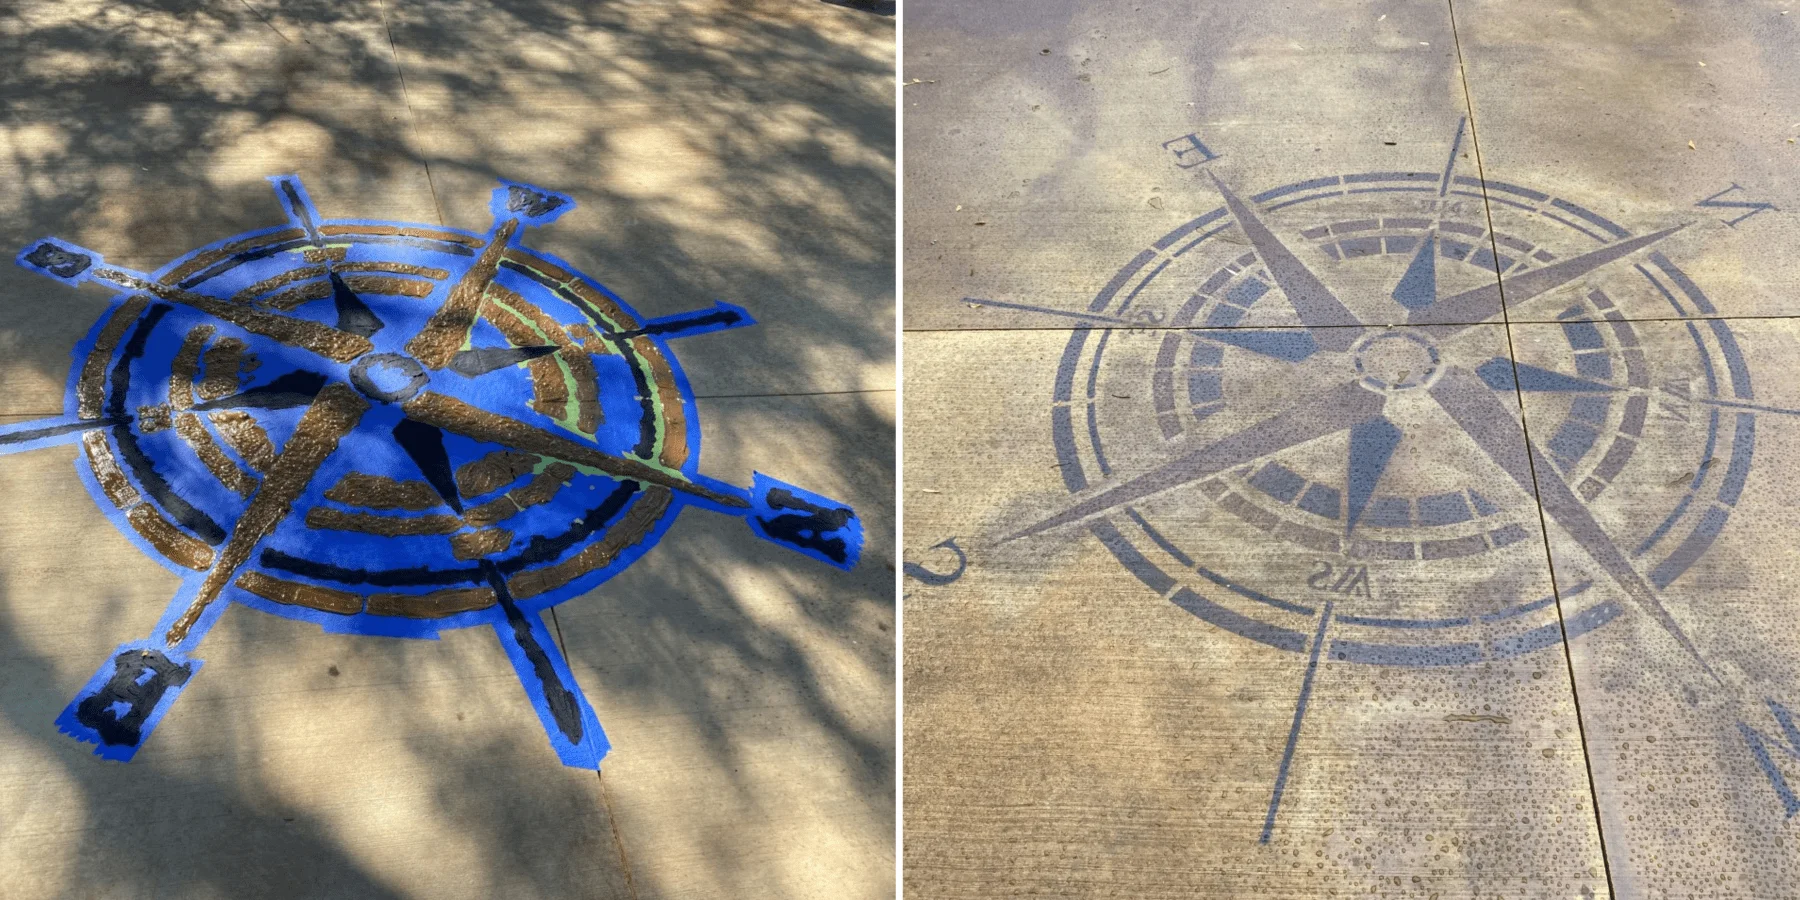
A crafty homeowner turned their sunken patio into a masterpiece. They stained the concrete with shifting sand and cola acid stains, then traced and stained the interior of the compass design with English red, Coffee brown, and black DecoGel. This homemade project is a great example of how a little work and some quality stains can make any space look awesome.
Project Info:
- Project Completed In: 10 day(s)
- Estimate of Square Footage: 285 sq. ft.
- Project Description:
This was partly sunken patio project, on new concrete poured in July. I started the staining in September, with many pauses due to fall weather rolling in. The traveler’s compass stencil was the biggest challenge, needing a lot of careful taping that was very time consuming. This was a first-time experience with acid stain for me, and I did make a few mistakes along the way; I learned a lot and we are happy with the final result. The actual work took about 10 days, but with temperature and weather delays it was 20 days from beginning to end. - Personal Tips:
Be aware that outdoor concrete will have sloping for drainage, and adding too much water or stain may cause the stain to run across the surface. Some stains colors set in faster than others, and if you don’t allow for the full set up time, you may get an entirely unexpected color as a result – not a lighter one! Black deco gel and Coffee worked very well with the painter’s tape, however English Red overpowered the tape and bled. When using gallon sprayers – the ones that have a side valve to release pressure are great so you don’t get a face full of acid when you have to open the top. - Other Products Used:
A lot of Frog Tape painters tape; muriatic acid to clean up spots where the tape bled. HDX sprayers from Home Depot. - Direct Colors Products Used:
1 Gal. Shifting Sand EverStain™ & EasySeal™ Satin Kit
1 Gal. Cola Buff EverStain™ & EasySeal™ Satin Kit
1 Qt. Coffee Brown DecoGel™
1 Qt. Black DecoGel™
1 Qt. English Red DecoGel™
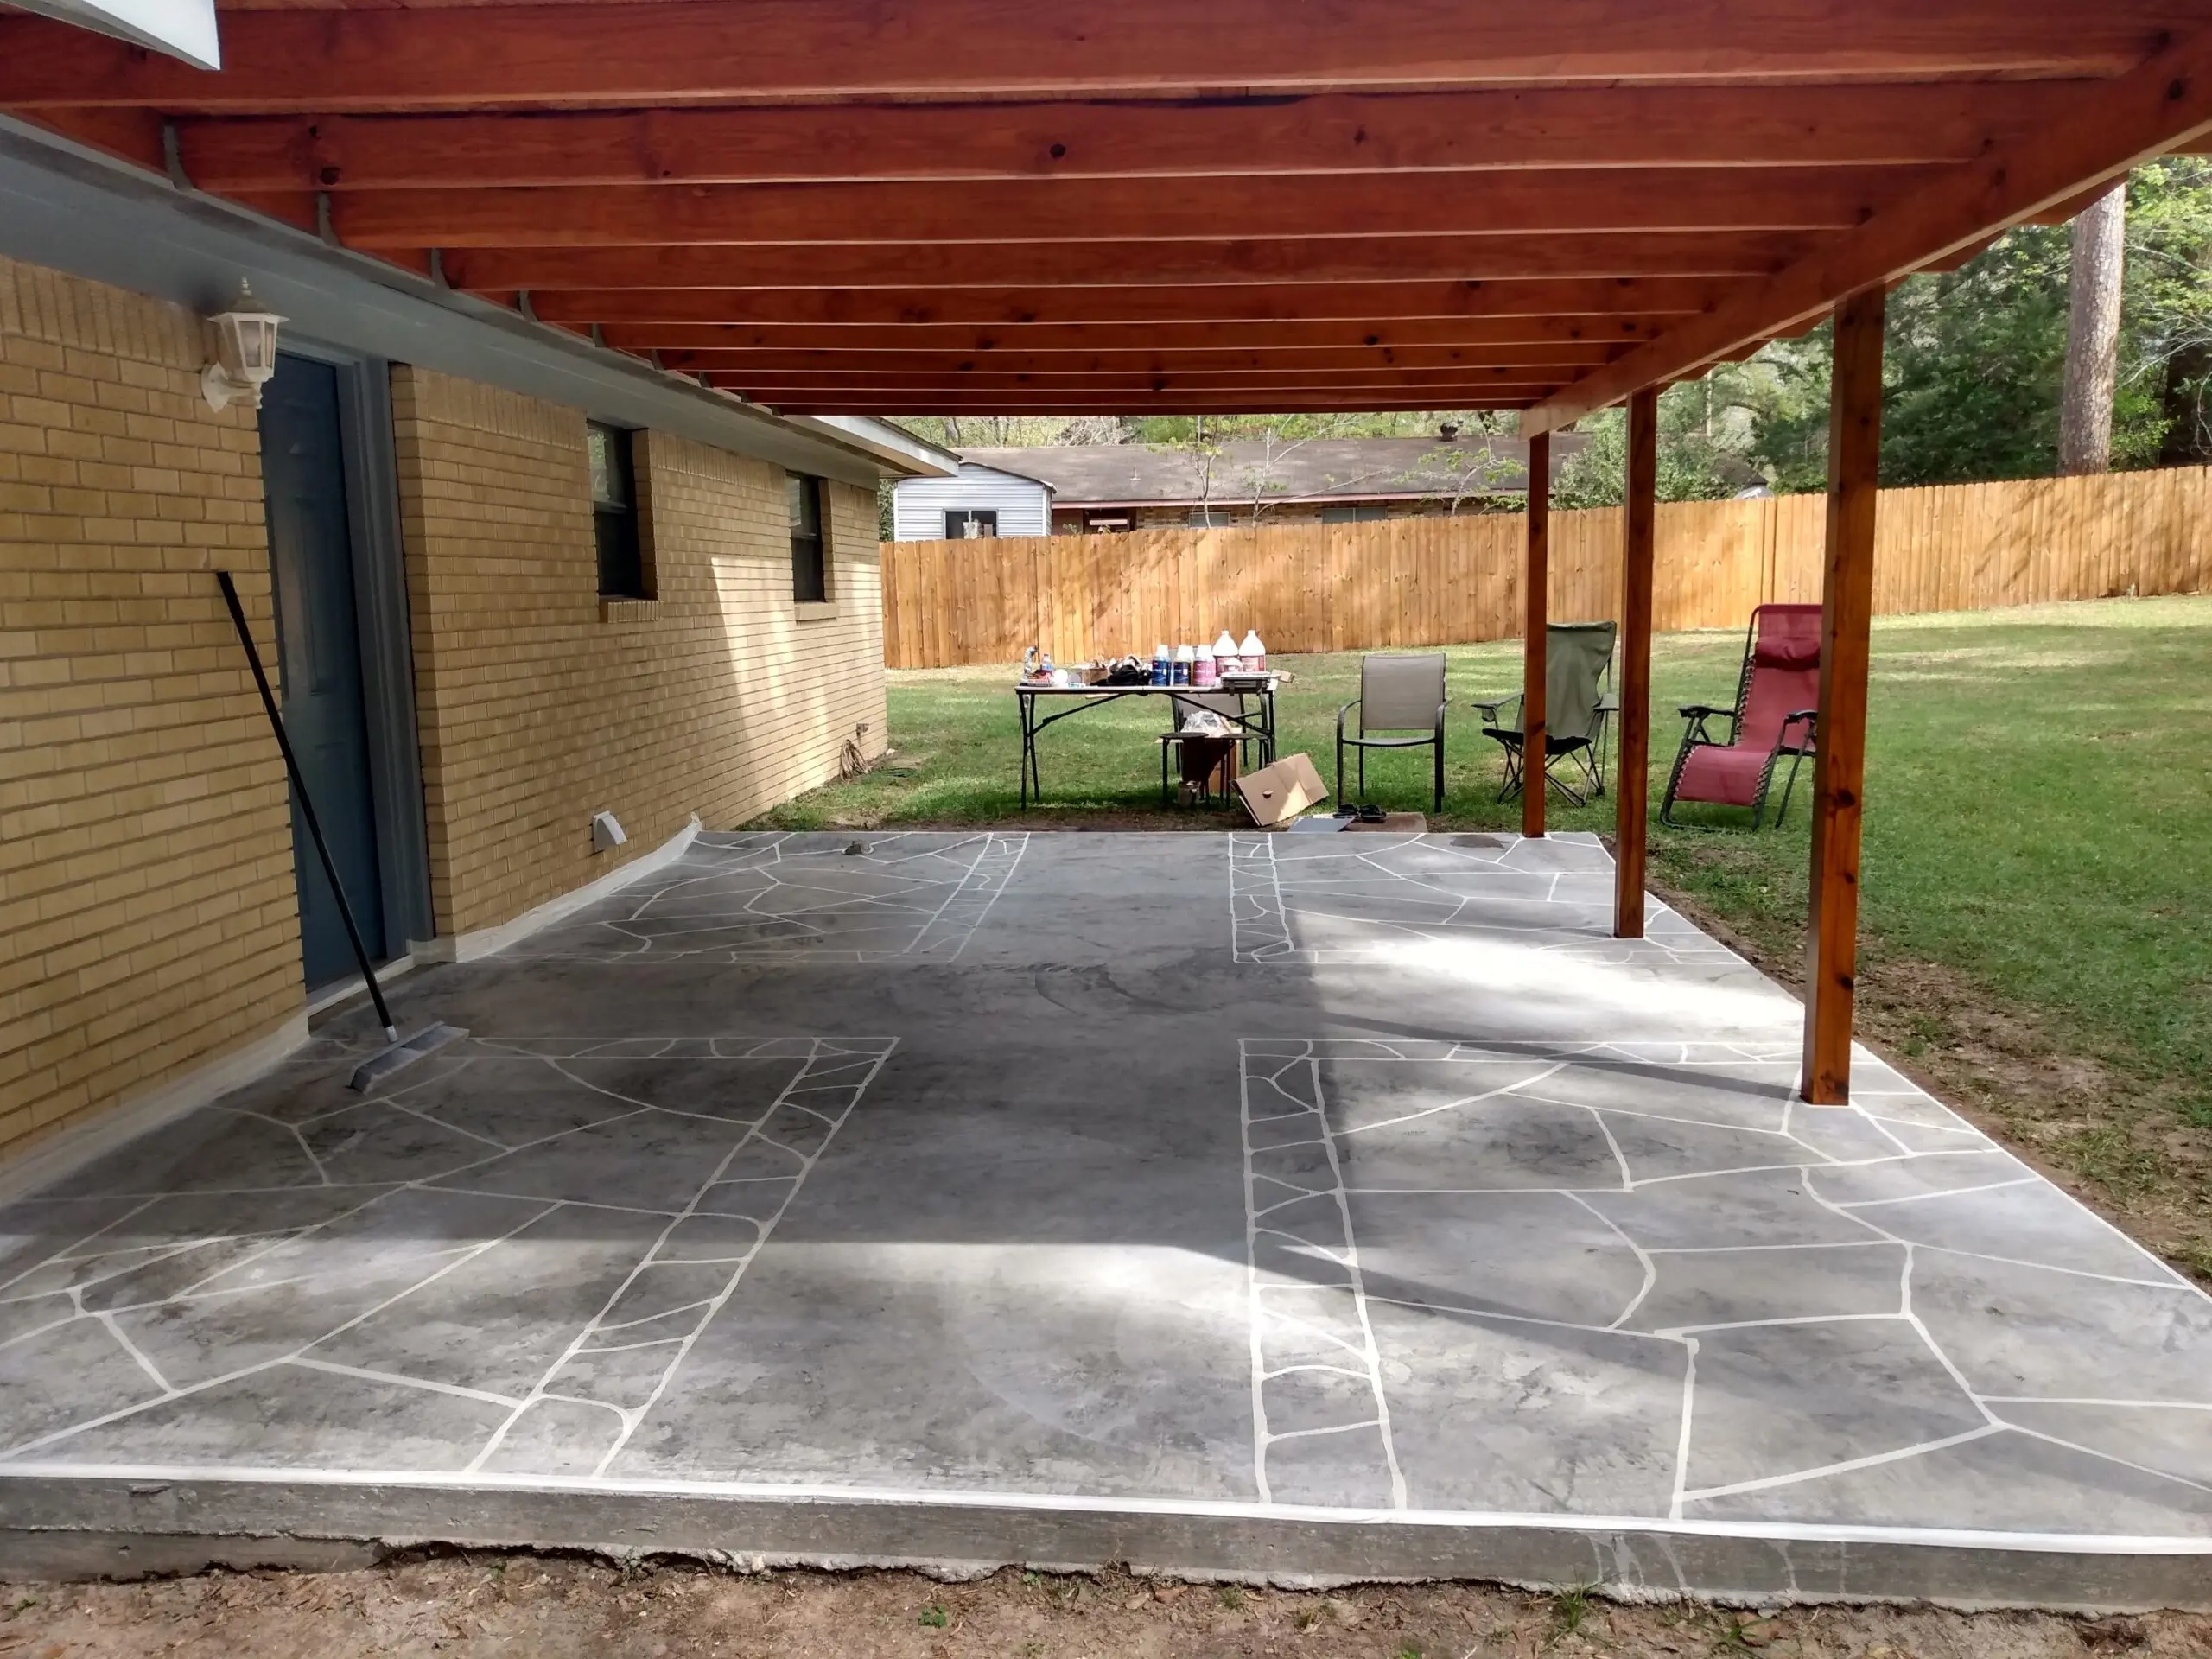
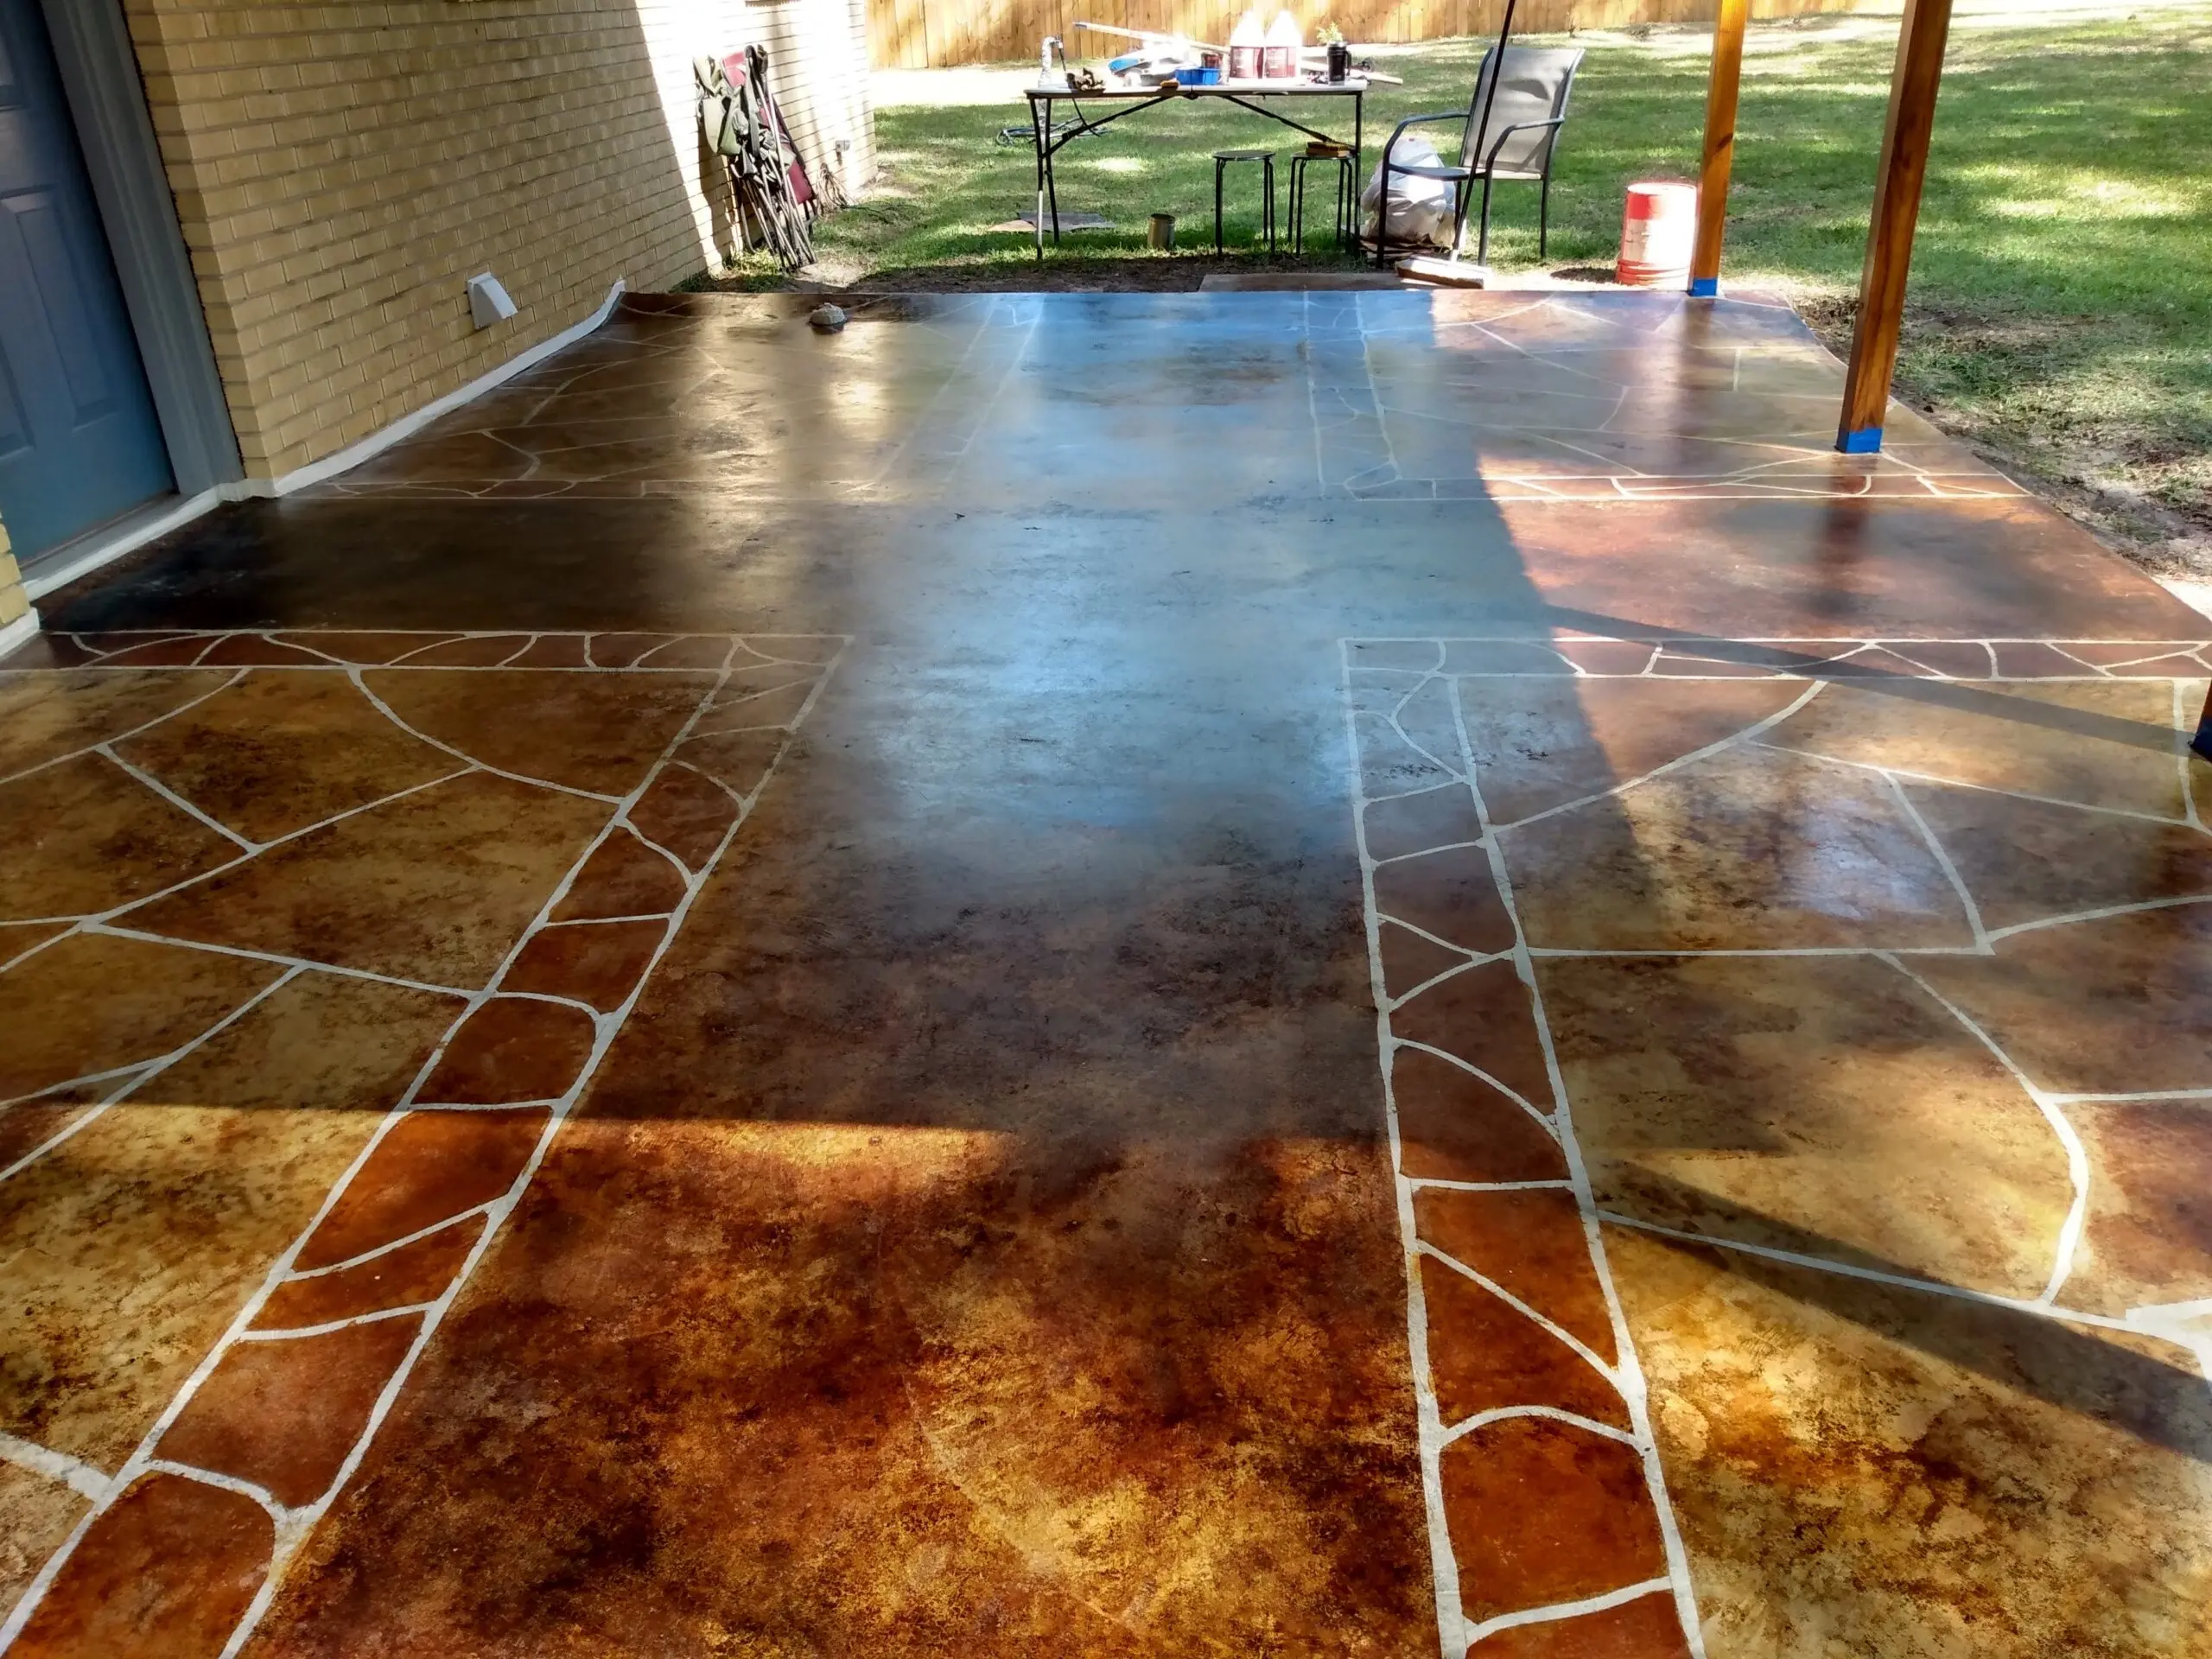
See how a customer turned a cracked patio into a beautiful space with a faux flagstone design and black EverStain™ acid stain. A simple tape and stain approach made all the difference!
Project Info:
- Project Completed In: 20 days (weather)
- Estimate of Square Footage: 300 sq. ft.
- Project Description:
Porch built ~3 years back and could never decide between lumber flooring or $$ pouring slab until I got referred to a concrete worker with a reasonable estimate who assured me of a ‘slick’ finished floor (I know, when wet, etc. but I wanted a smooth finish. He hand troweled the final pass) . Once the floor was poured internet searches for ideas led to this page https://directcolors.com/diy/concrete-patio-ideas/
The faux flagstone got me. Never the artistic type ever, I had to try this. Little over a month cure time, taped it off…Coffee Brown walk way, English Red border, Malayan Buff and mixtures in the ‘stones’, all EverStain™ Acid Stain, Easy Seal top coats. To say I’m well pleased with the outcome would be a major understatement.
ps. One quart container of sealer came damaged and an email to Customer Service had a replacement on my doorstep in a couple days! Direct Colors is the go to for this type of project. - Personal Tips:
Some colors (on my floor English Red) will overpower everything else losing the contrasting tones I desired for this project….note that I used a spray bottle, and yep it bled over everywhere even though I thought I was going light. Were I to do this again, I’d use a brush and LIGHTLY keep it in the borders even if multiple passes were necessary. This is only if you’re wanting to see a dramatic color difference at borders.
I attempted to clean up the border bleed over with a Scotch Brite pad/ ammonia solution only to discover a remarkable lightening of color …touched up with stain again to find just enough mineral content left to return much of the contrast I desired. Patience with a project of this nature pays off!
Spike shoes are mandatory! - Direct Colors Products Used:
1 Gal. Coffee Brown EverStain™ & EasySeal™ Gloss Kit
1 Gal. Malayan Buff EverStain™ & EasySeal™ Gloss Kit
16 Oz. OxiGrip™ Slip-Resistant Additive (5-gallon mix)
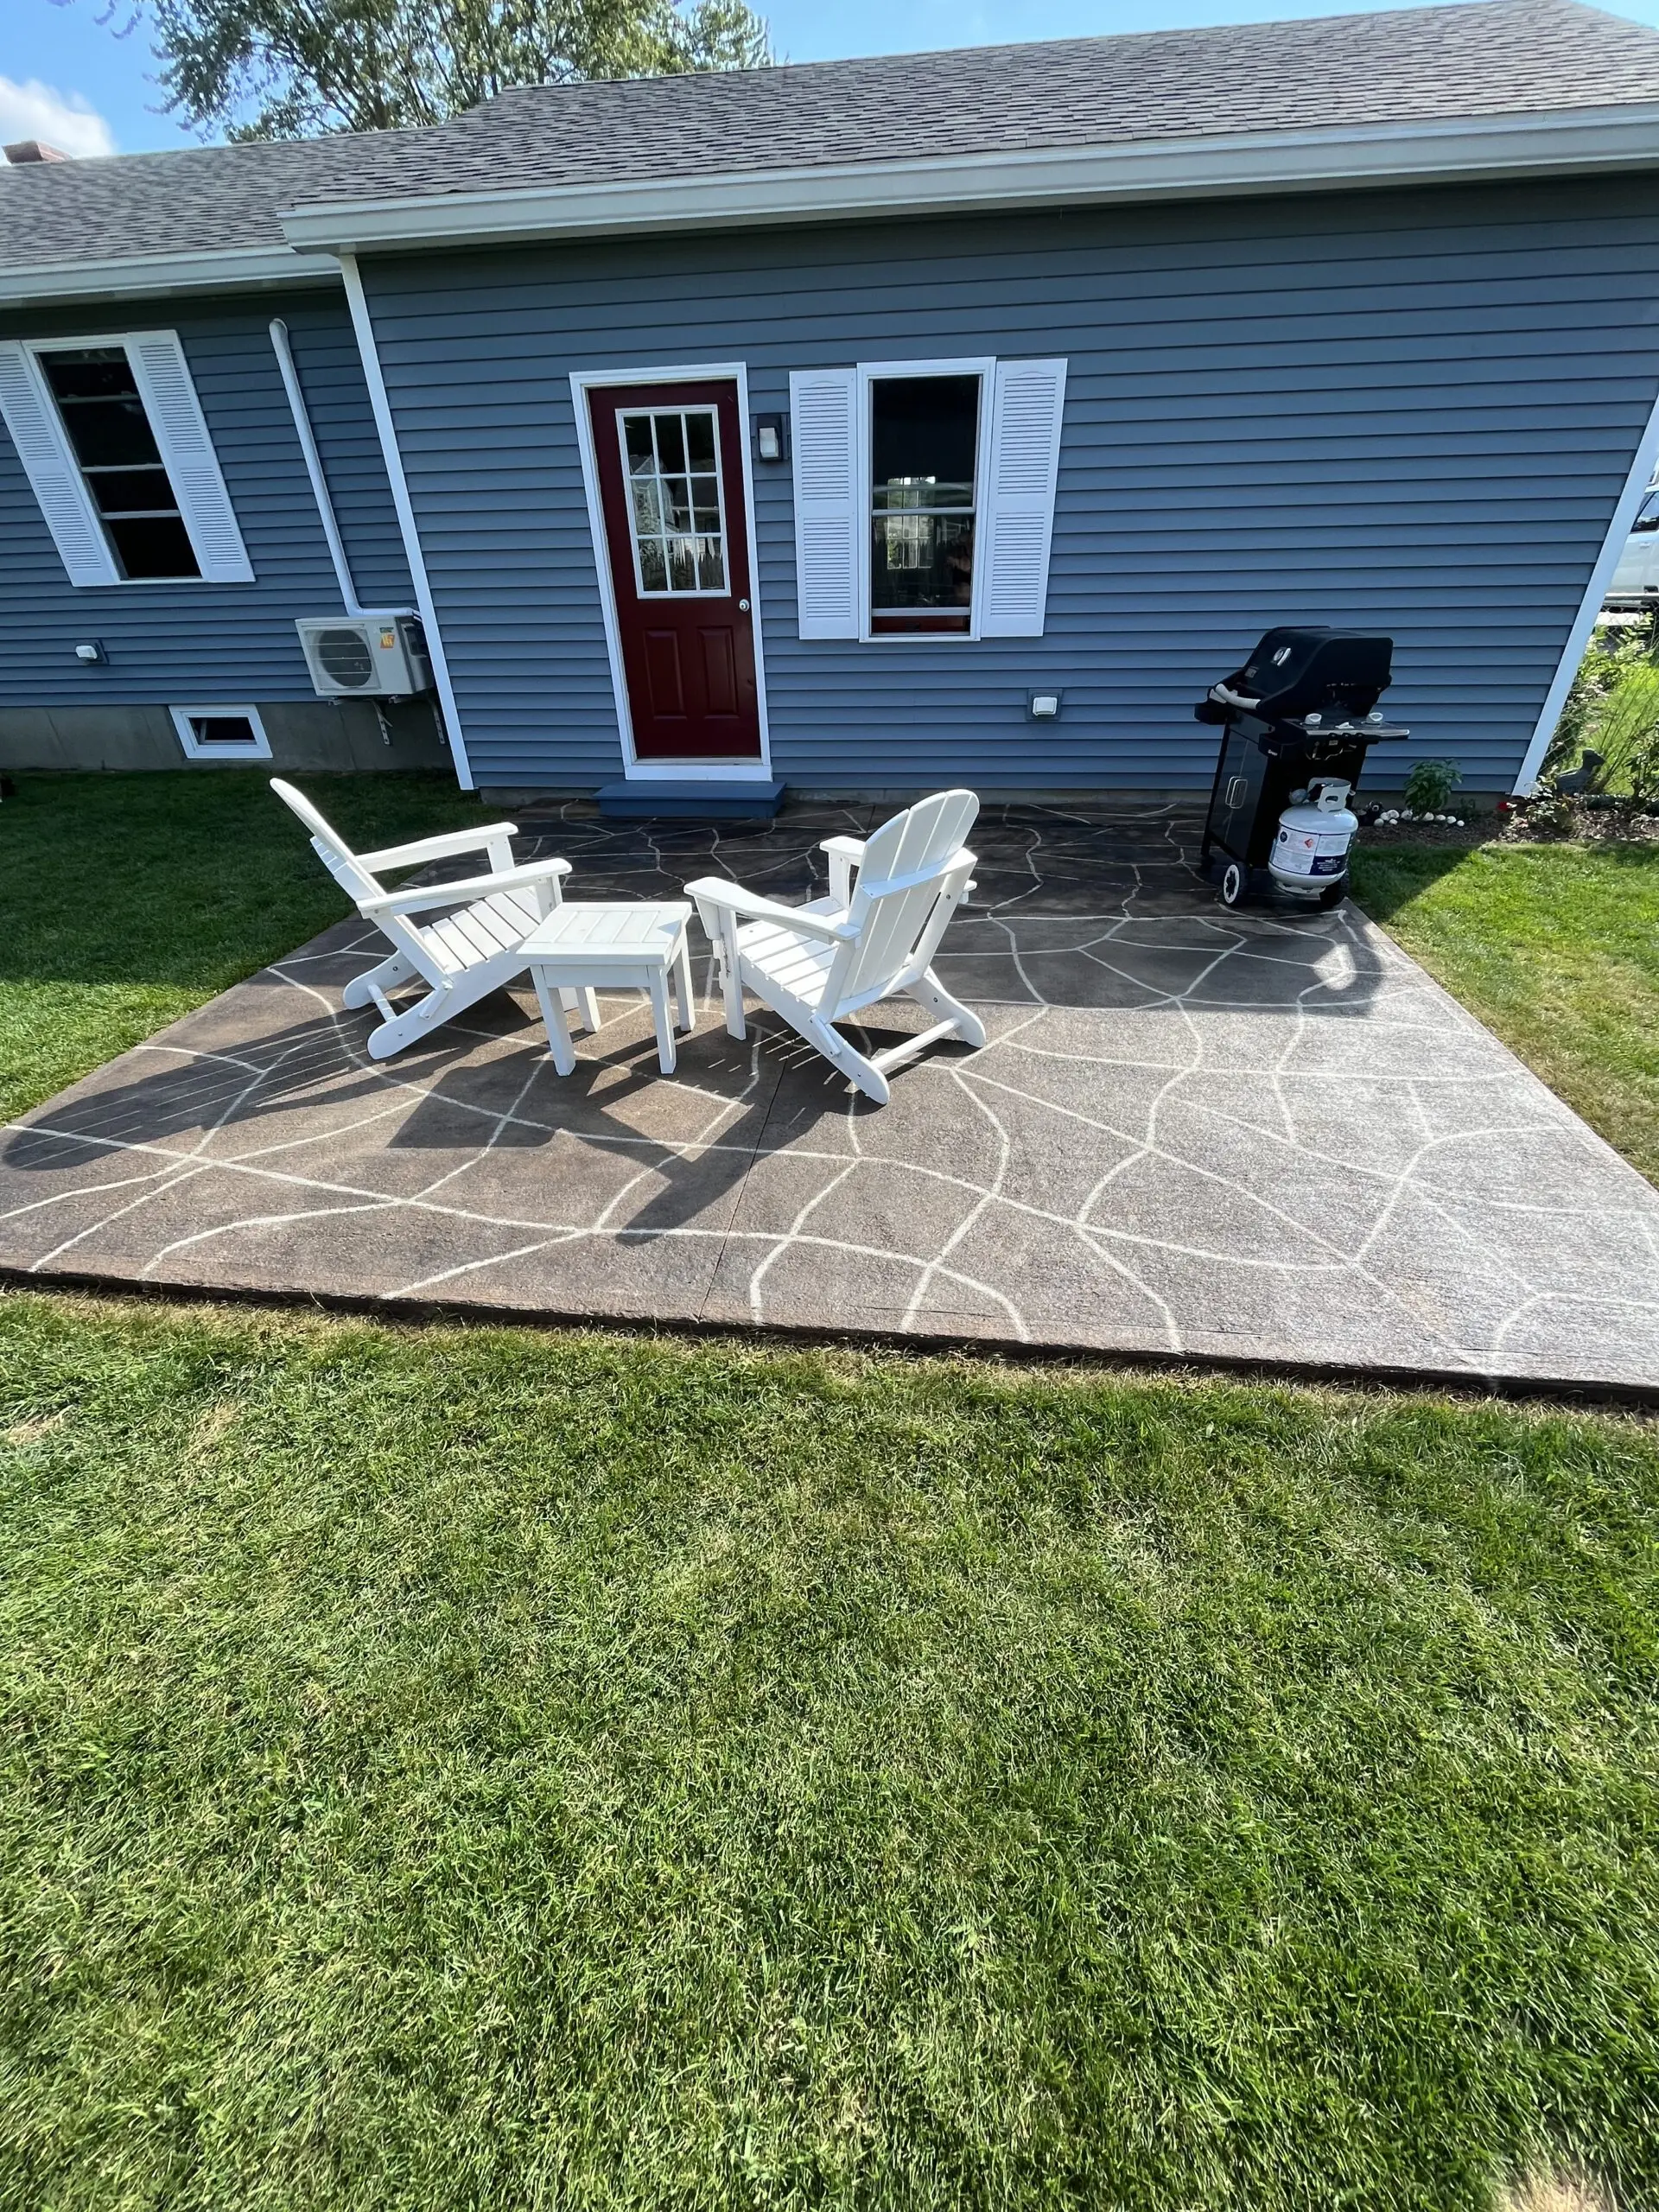
Flagstone Fix: Reviving a Cracked Patio
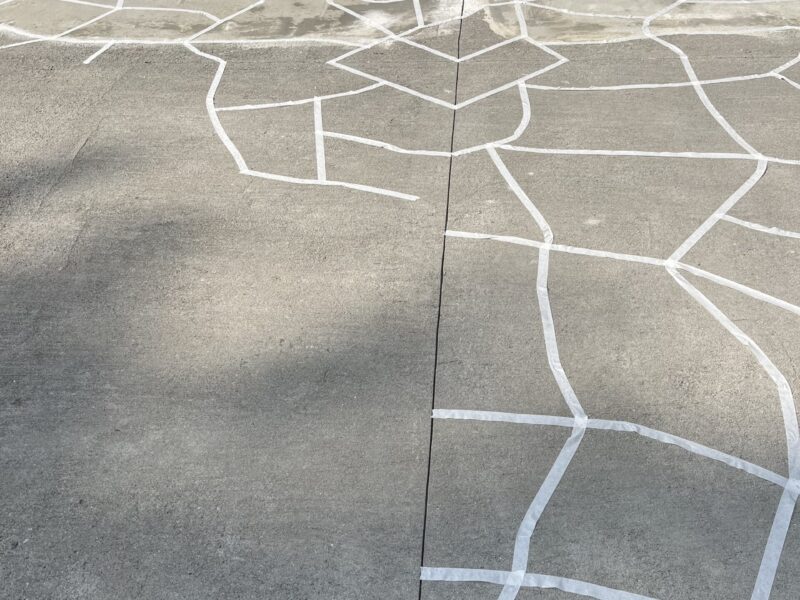
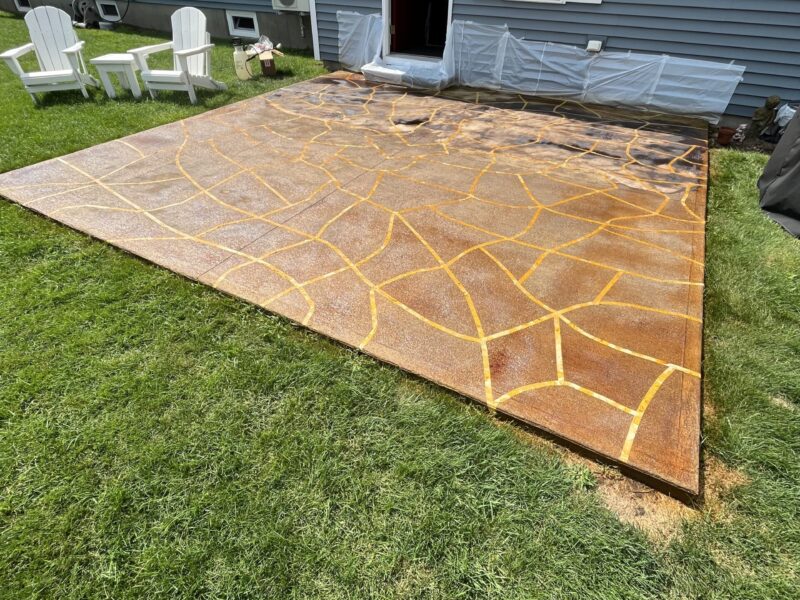
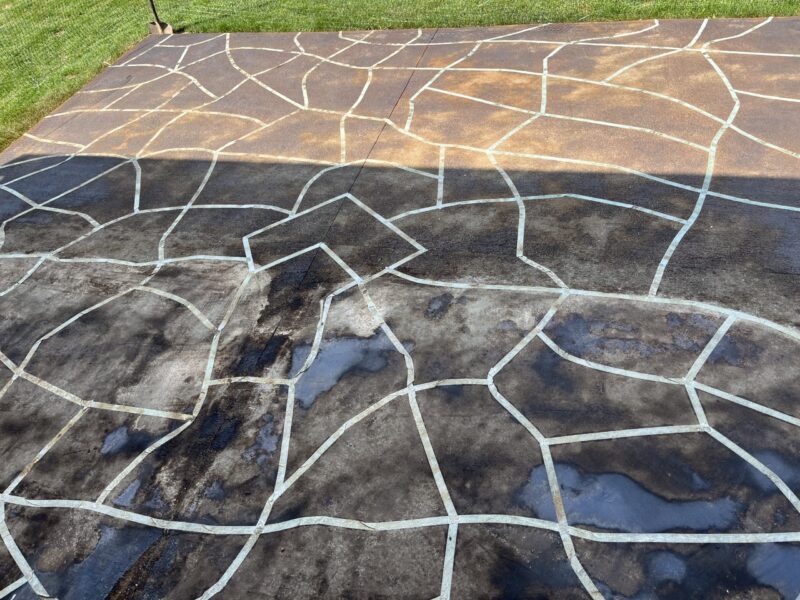
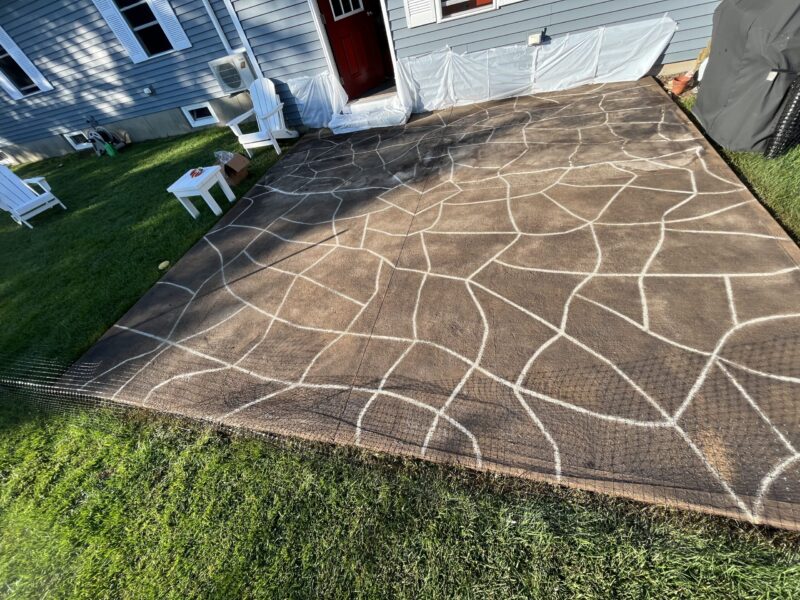
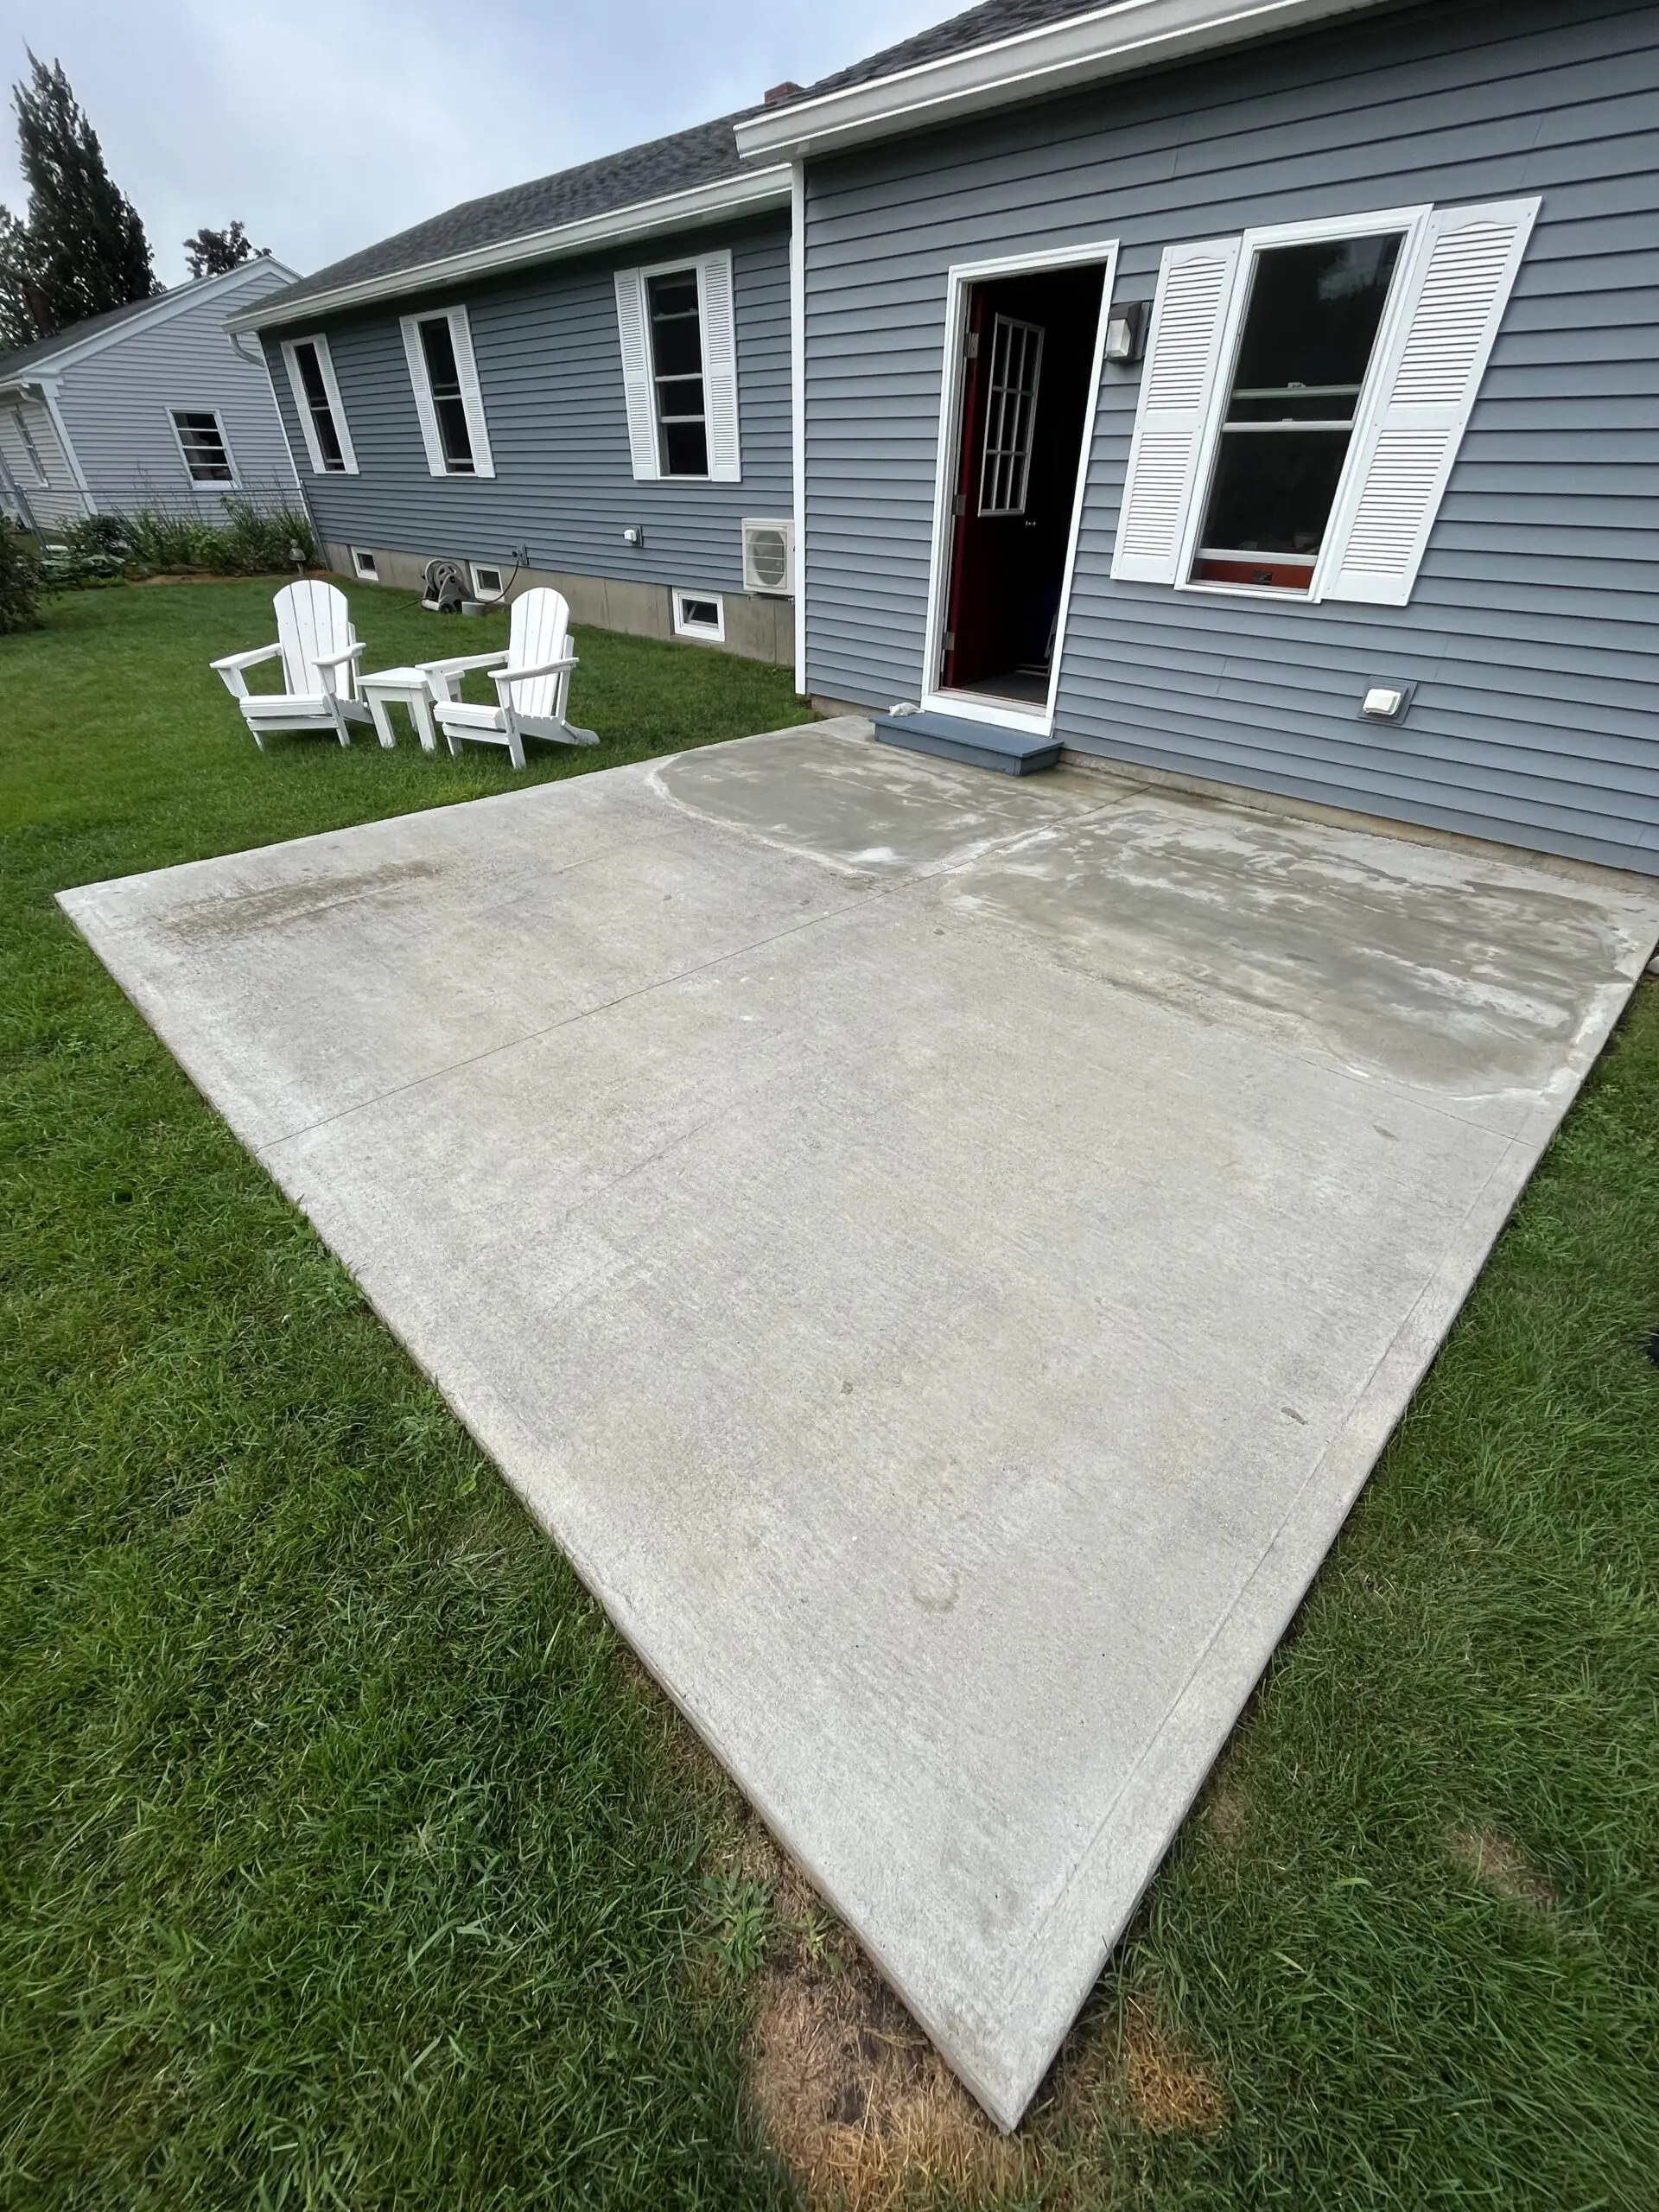
See how a customer turned a cracked patio into a beautiful space with a faux flagstone design and black EverStain™ acid stain. A simple tape and stain approach made all the difference!
Project Info:
- Project Completed In: 2 day(s)
- Estimate of Square Footage: 200 sq. ft.
- Project Description:
My patio had a crack right across it. I tried repairing it by filling it. Then by cementing over it. No matter what it looked ugly. I saw the faux flagstone idea on your web site. Taped the design. Used black acid stain. Looks better! - Personal Tips:
Using sprayer is very easy. Make sure that you tape all around. It gets everywhere! - Direct Colors Products Used:
1 Gal. Black DIY EverStain™ & AcquaSeal™ Gloss Kit - Other Products Used:
None. Water to rinse. Sprayer. Masking tape.
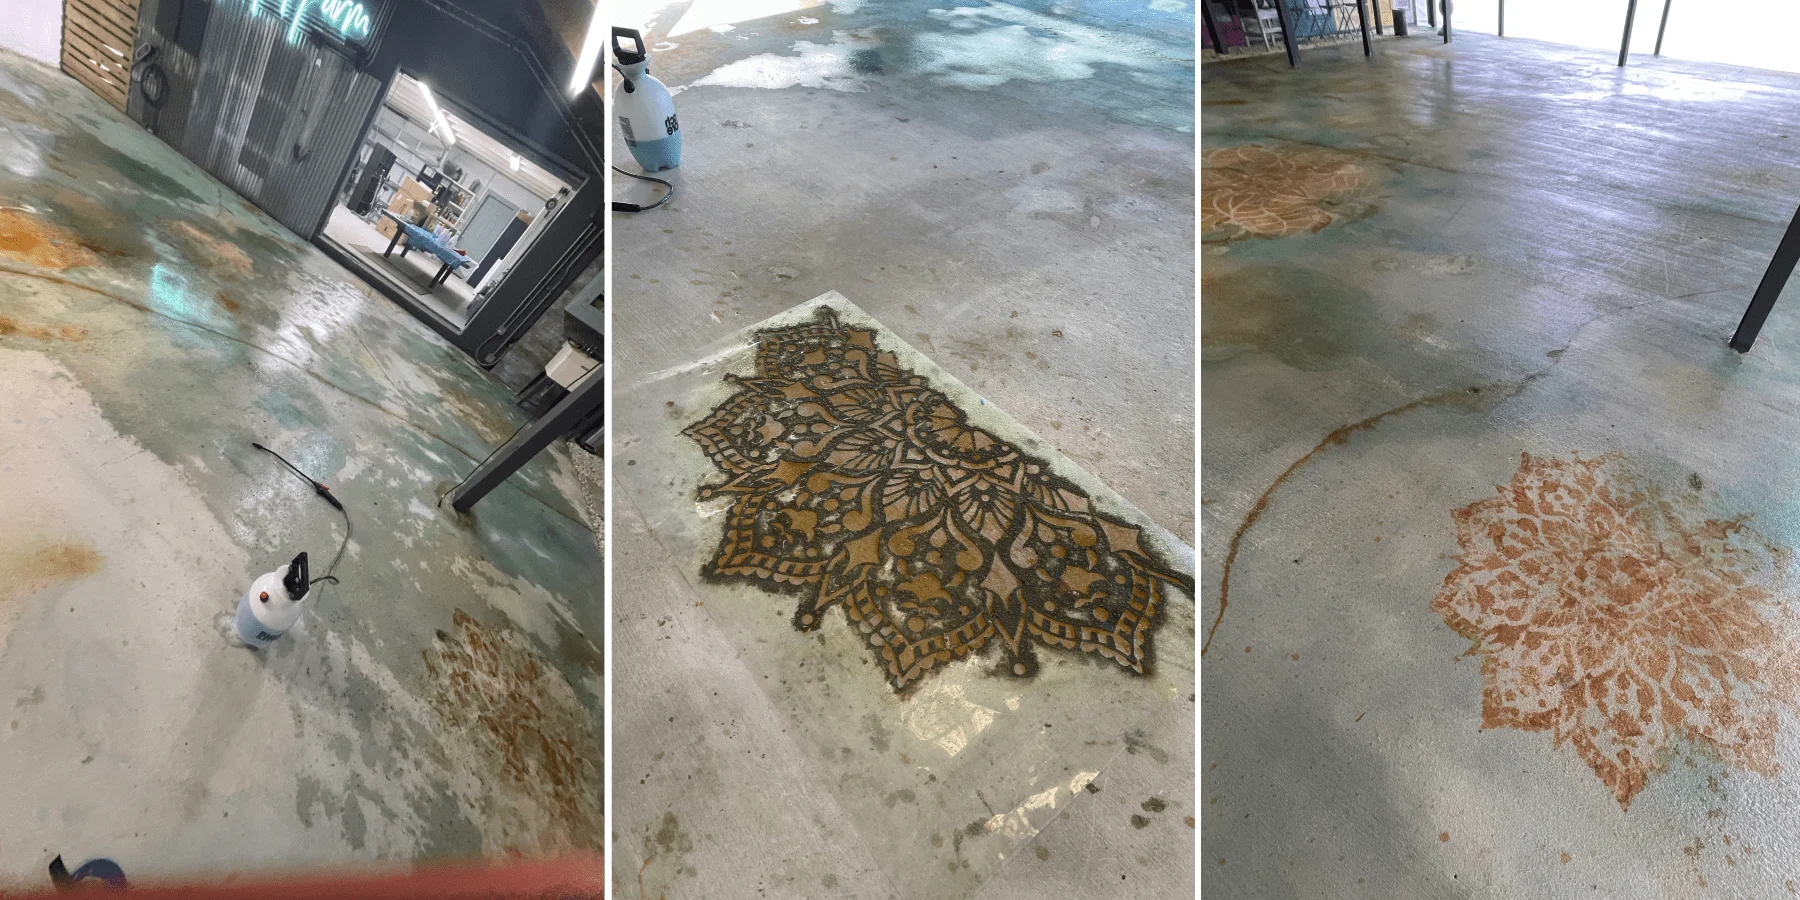
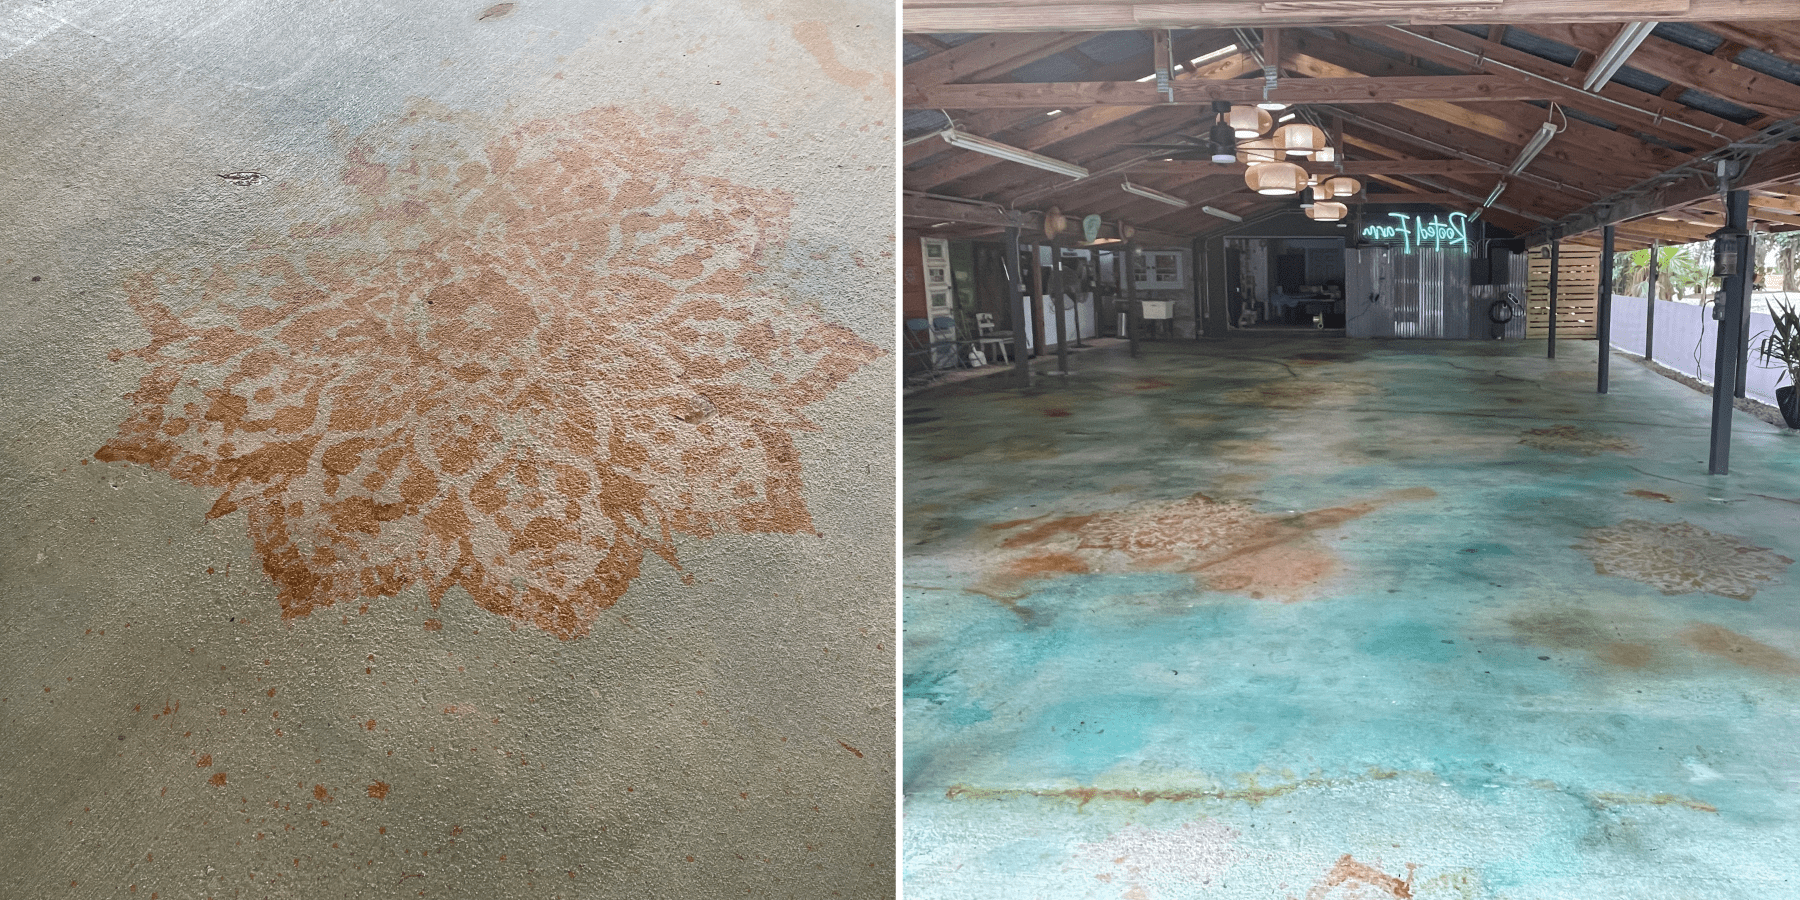
The customer had a vision of turning their space into a versatile venue for gatherings, retreats, and yoga. Acknowledging the floor’s years of wear and imperfections, the DIYer used them as an artistic advantage. They chose to work with stencils and acid stains to create unique floor art, bringing new life to the space. With no reservations about the outcome due to the floor’s initial condition, the DIYer’s efforts resulted in an unexpectedly pleasing transformation that uplifted the entire area.
Project Info:
- Project Completed In: 5 day(s)
- Estimate of Square Footage: 1200 sq. ft.
- Project Description:
We bought our farm two years ago and have been cleaning up thirty years of neglect and hoarding. We couldn’t even see the floors in this barn when we first started. Once all the clutter was cleared, we knew we wanted to make the floors visually appealing. Our dream is to use this space for venues, retreats, and yoga. We decided to use the floors unique imperfections to our advantage. - Personal Tips:
I did lots of research before taking on this project, the tutorials and how to videos were very helpful. Our floors had lots of imperfections and years of wear. So, in order to make them visually pleasing, I decided to use stencils with acid stain to create art on the floors. I noticed no one has used stencils before, so I figured why not? The floors were in such bad shape so I really didn’t care how the stencils would turn out because anything was better than the original. We ended up using a lot more stain and sealer then first anticipated, we had to put our project on hold to order more. Keep in mind the condition of your concrete when ordering your supplies. - Direct Colors Products Used:
5 Gal. Azure Blue EverStain™ & EasySeal™ Gloss Kit
1 Qt. Malayan Buff EverStain™
1 Gal. Desert Amber EverStain™ - Other Products Used:
We also used the spiked shoes, a one gallon sprayer, and multiple spray bottles. Also two large stencils.
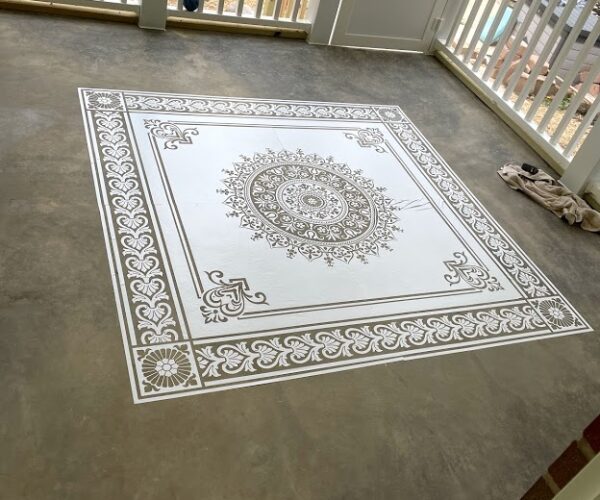
Porch Perfection: A Stencil-Stained Masterpiece
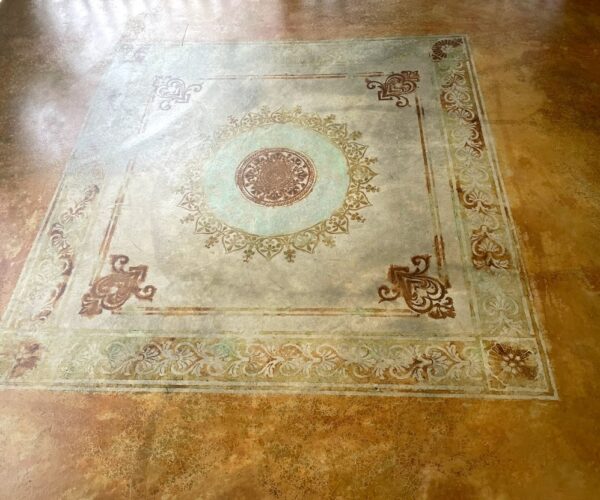
Check out our customer’s amazing transformation of a 10×12 ft porch using stencils and acid stains. Get inspired with simple tips on how you can create a stunning look for your own porch!
Project Info:
- Project Completed In: 4 day(s)
- Estimate of Square Footage: 120 sq. ft.
- Project Description:
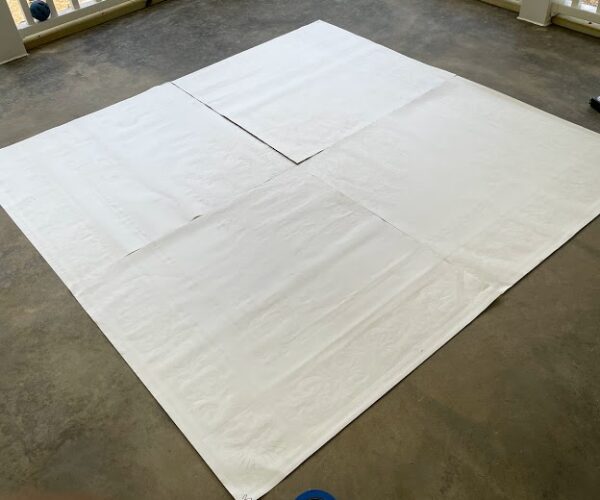
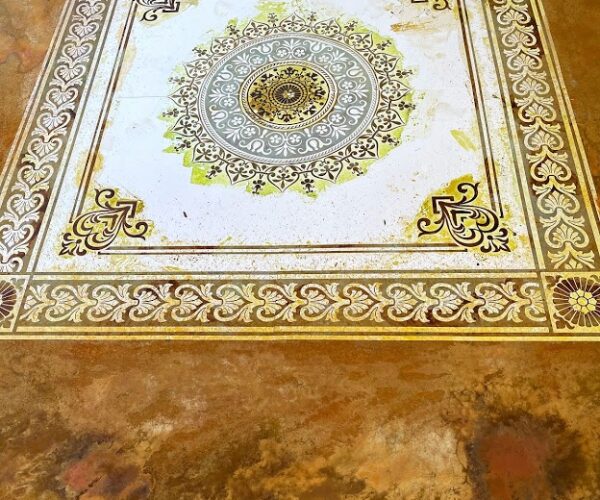
Had an addition to the house and included a covered screen in porch of 10×12 ft. Decided to stain the concrete and add a stencil. Used a Modello stencil on the project and multiple color stains for the overall look. - Personal Tips:
For some reason only the English red had issues with bleeding through the stencil. We also left the inside of the stencil without stain as the contrast was nicer than trying to add another color. I taking the time to lay the stencil out is key. I used a sponge to apply the colors to the stencil and a sprayer to stain the border. Also, do not judge your work until after the sealer is applied as it really helps the colors show. Overall, it was a fun project. I would do it again. - Direct Colors Products Used:
1 Gal. Desert Amber DIY EverStain™ & AcquaSeal™ Satin Kit
1 Qt. Malayan Buff EverStain™
1 Gal. Desert Amber EverStain™
4 Oz. Azure Blue EverStain™
4 Oz. Avocado EverStain™
4 Oz. English Red EverStain™ - Other Products Used:
Modello Stencil- Bradbury CC101 Custom Carpet & Ceiling Stencil 6x6ft.
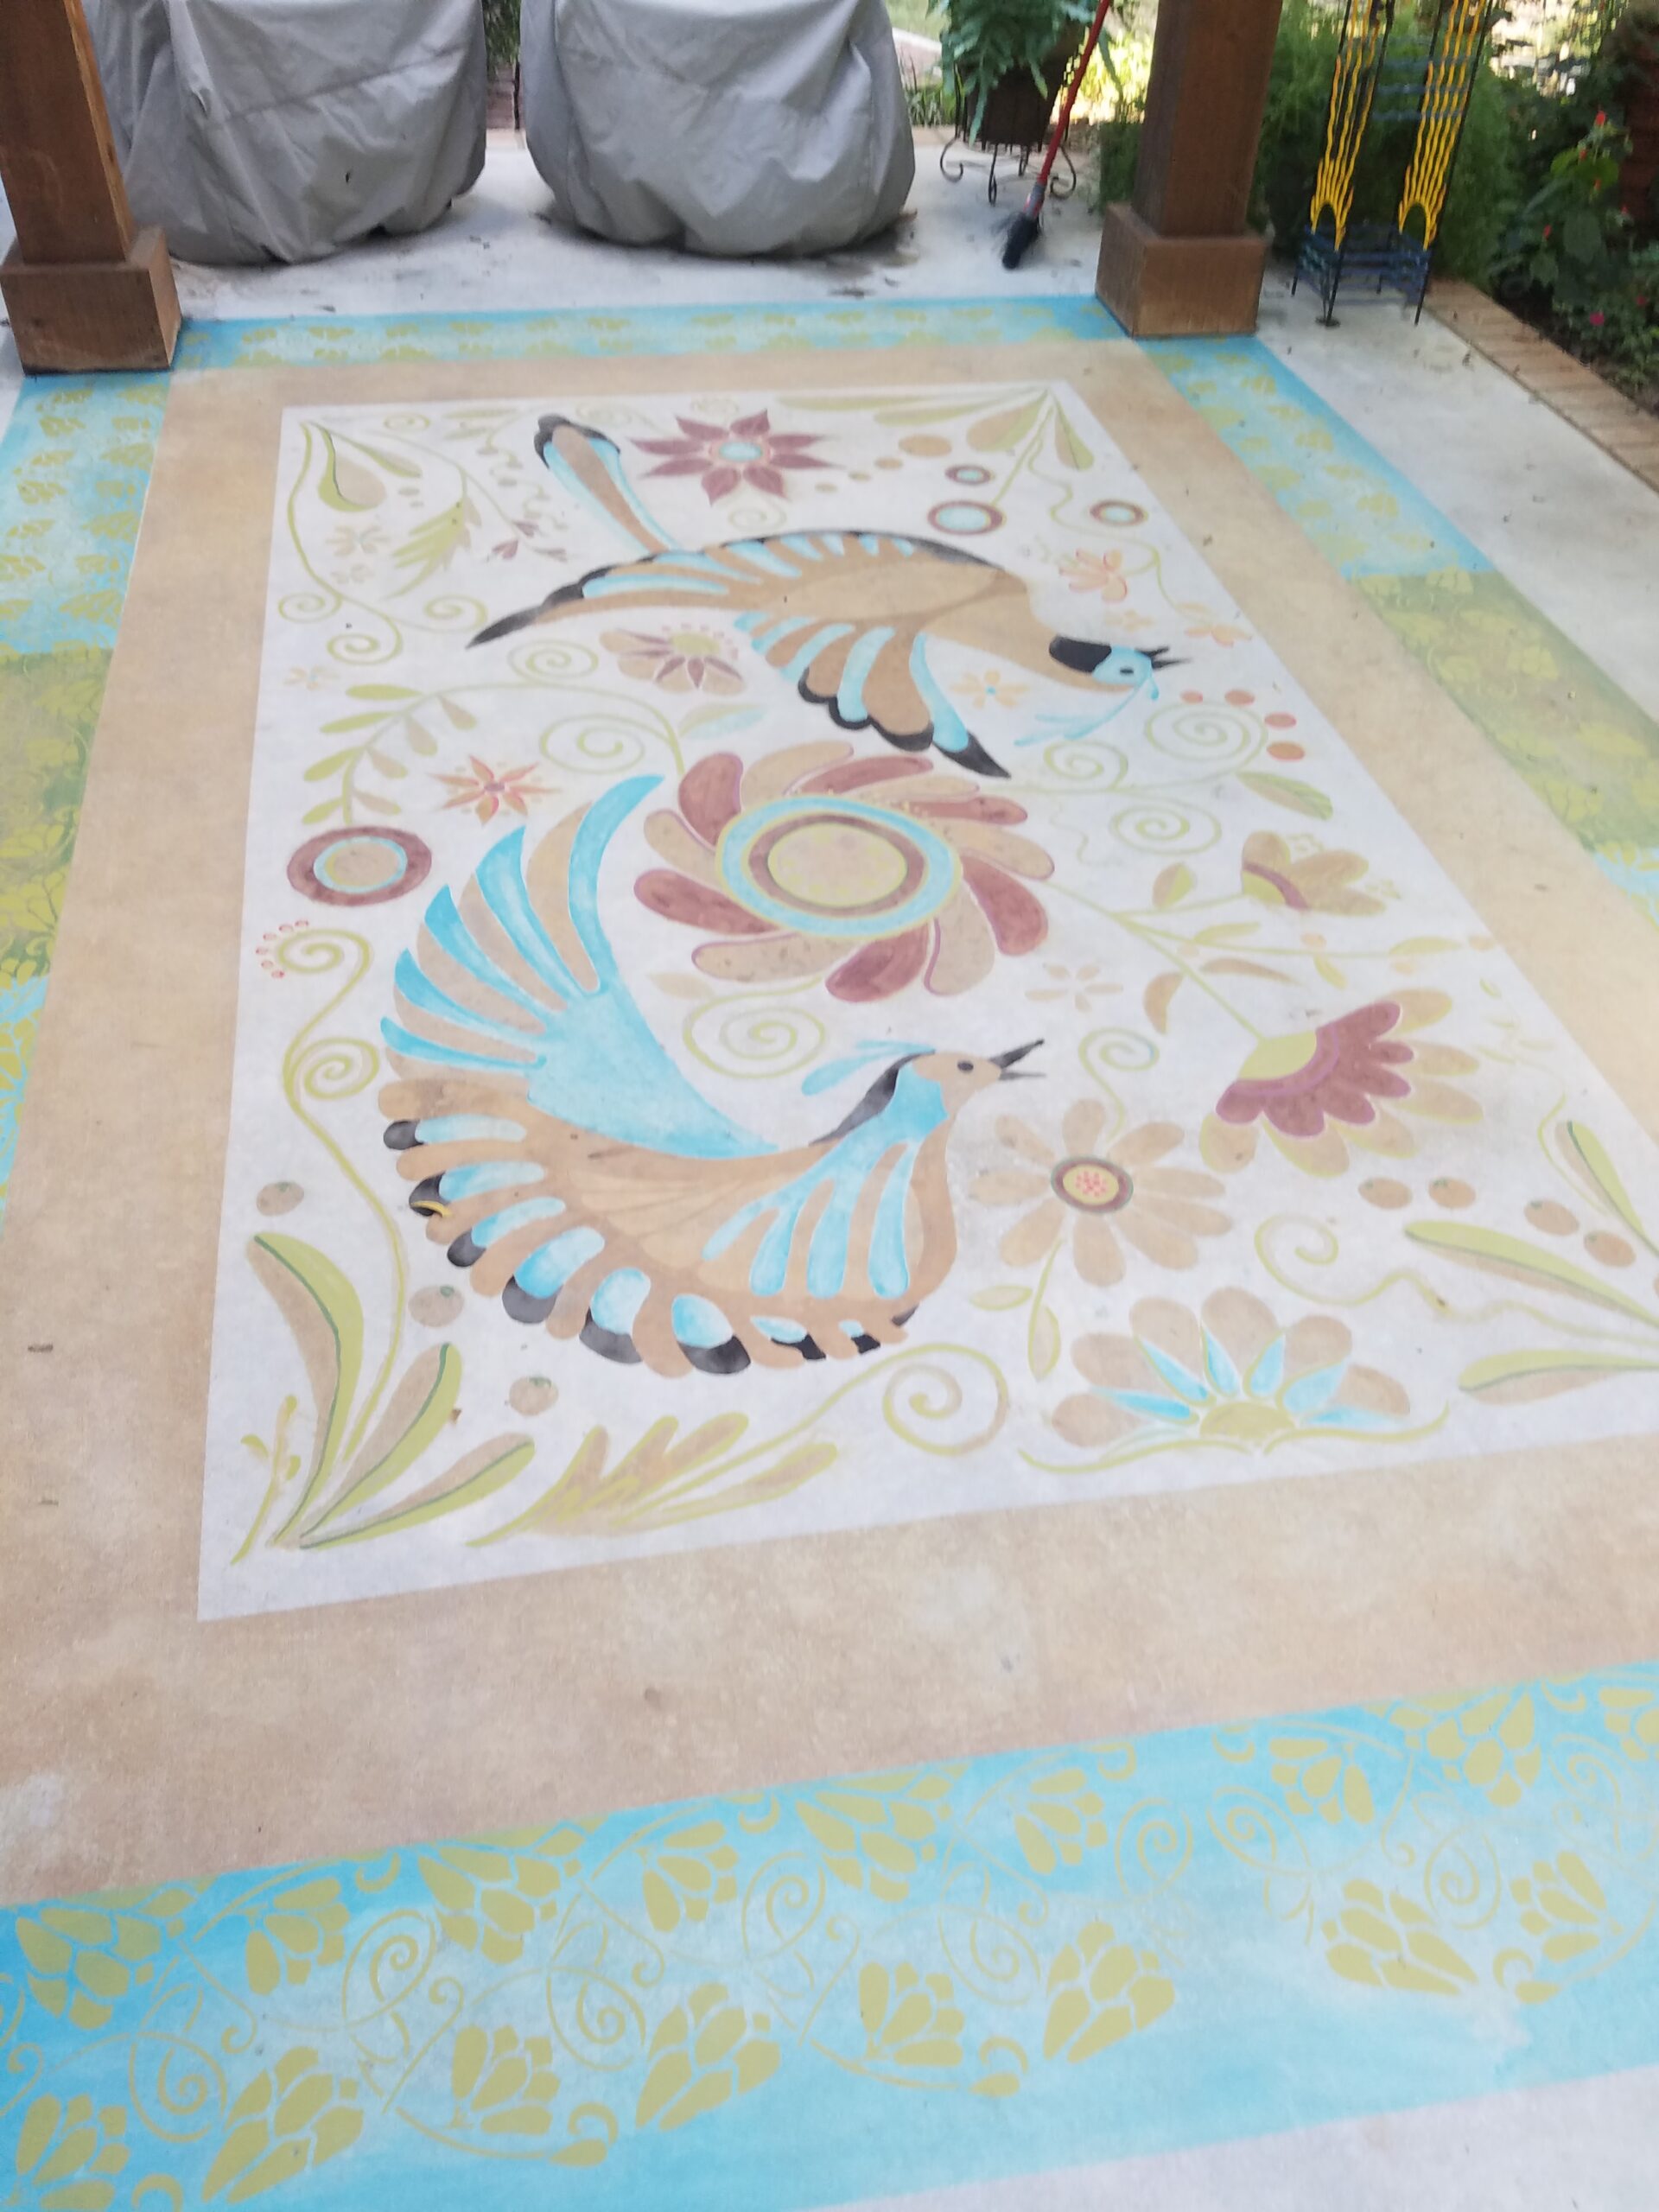
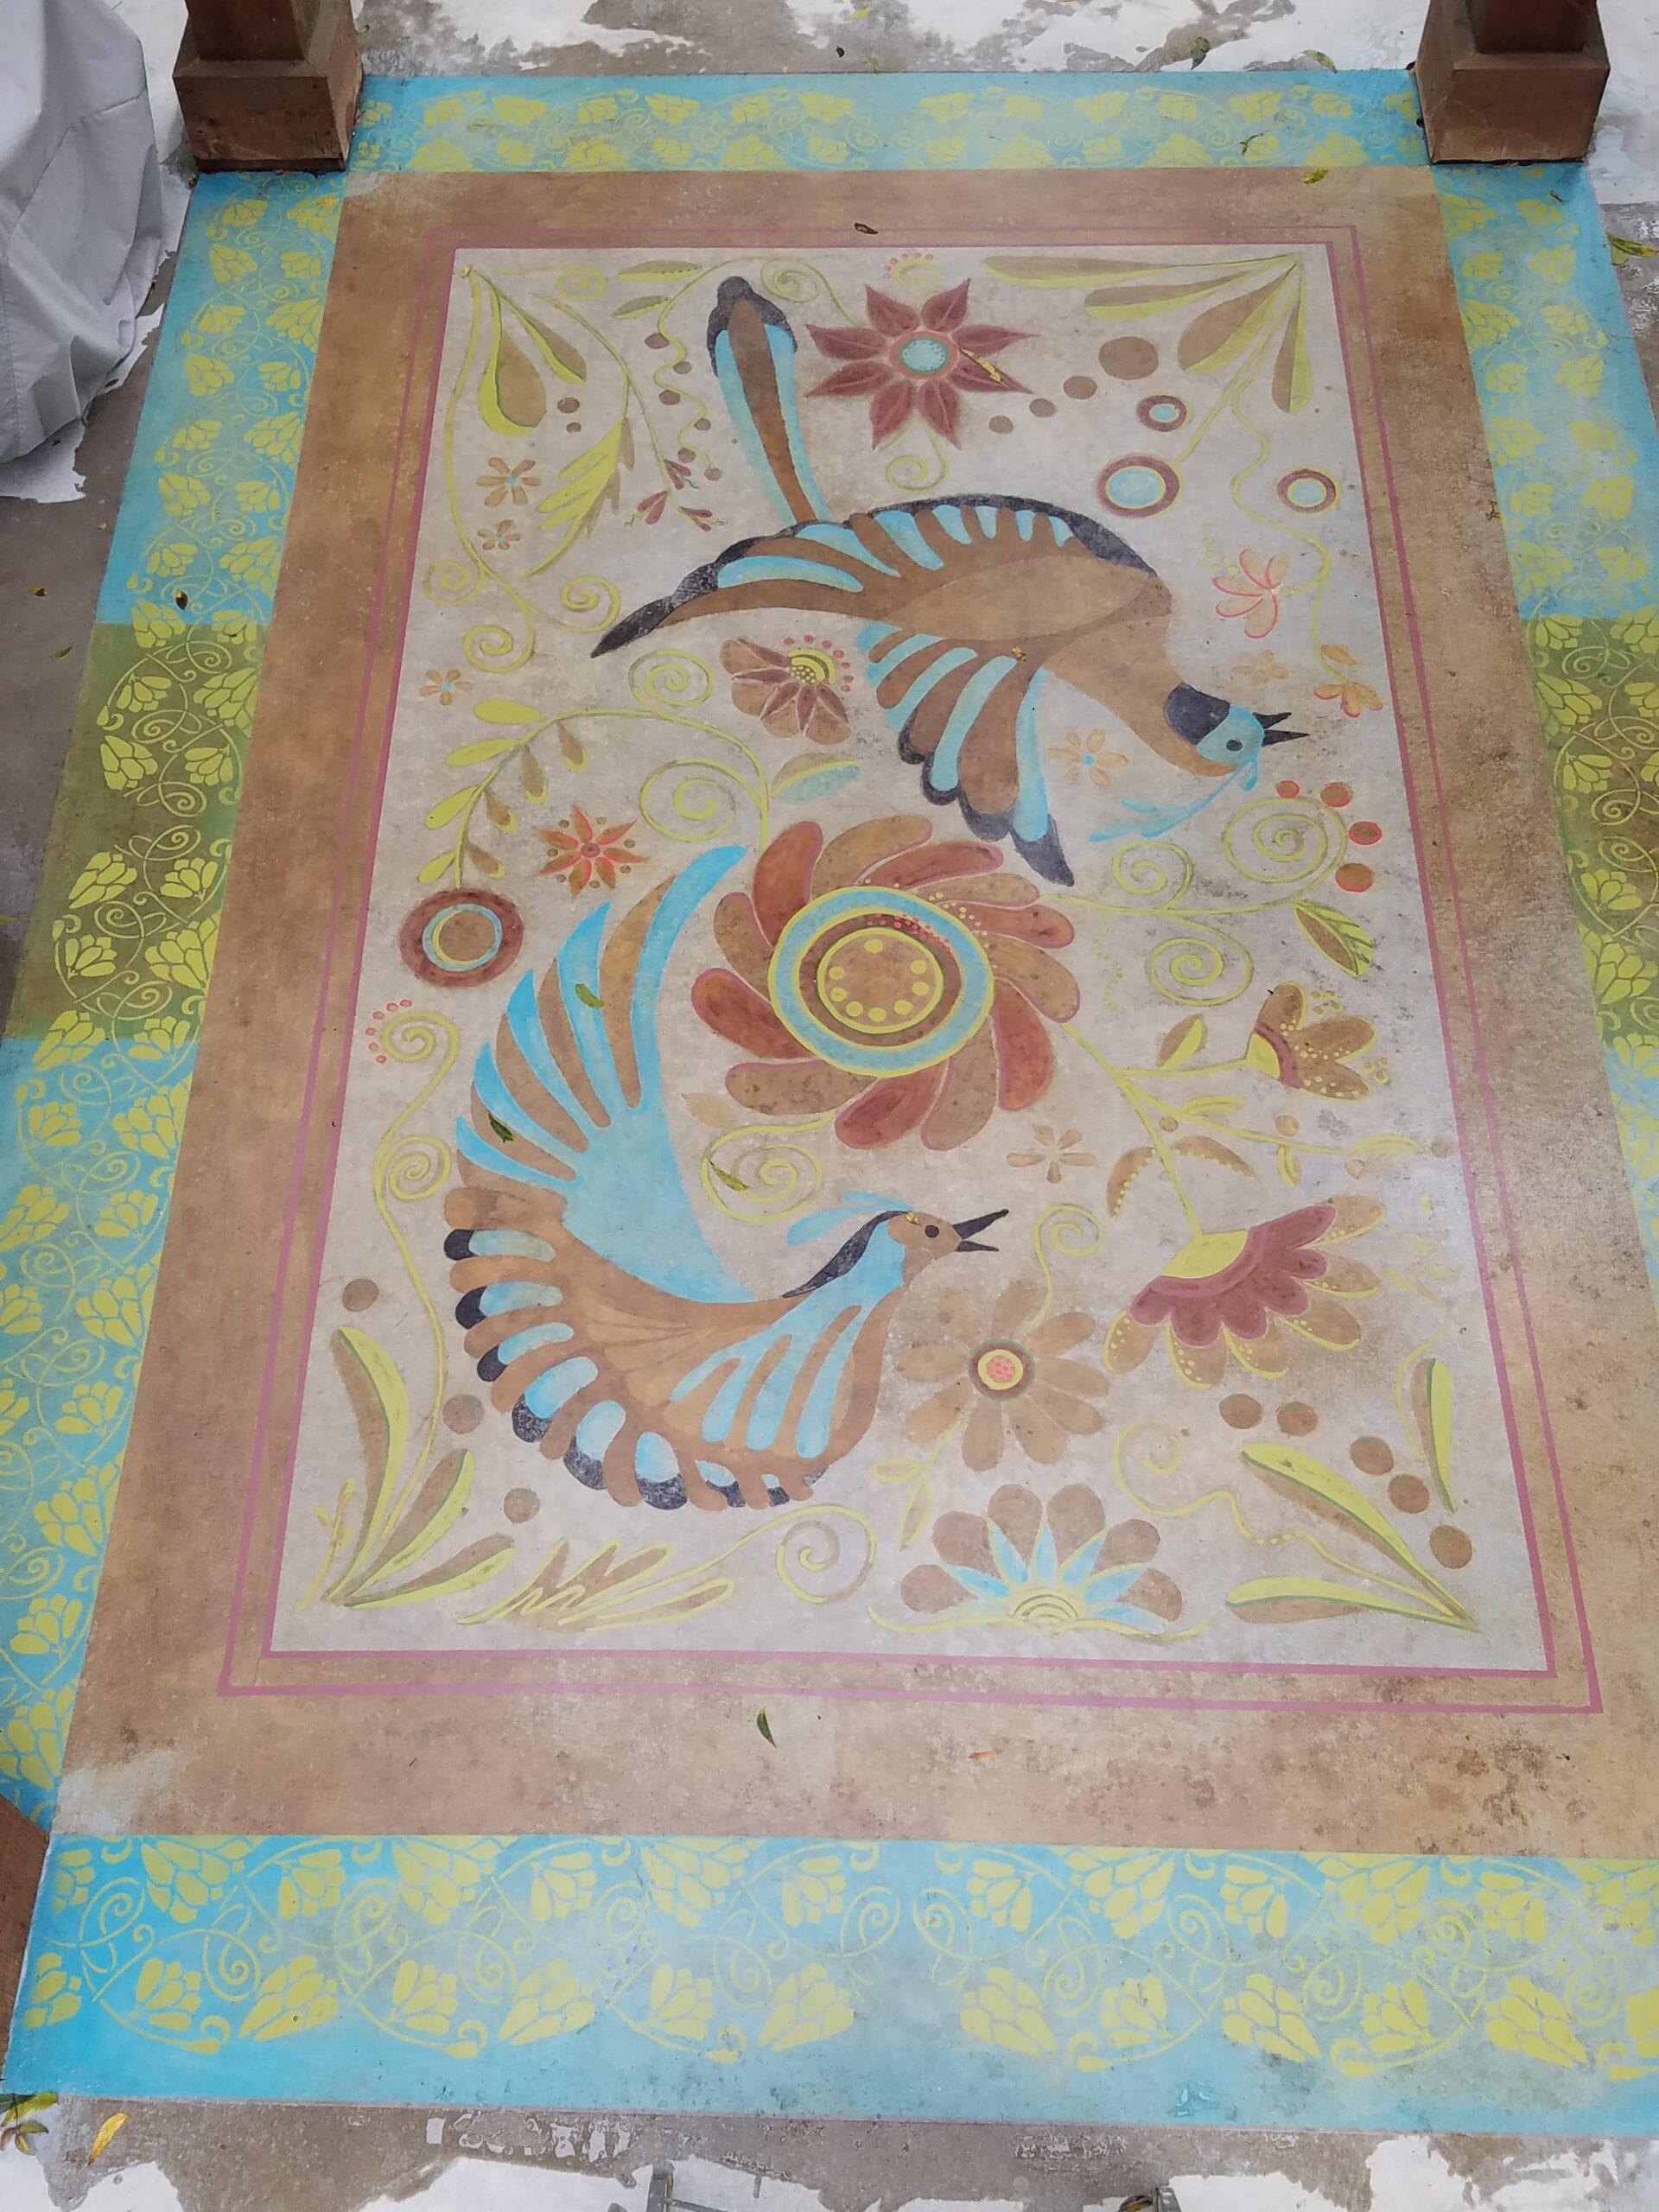
Custom Carpet Design: Bird Stencil Magic
See how a customer made their porch special with our DecoGel™ acid stain colors and a bird themed stencil. It’s concrete that looks just like a fancy rug!
