How to Change the Color of Already Stained Concrete with Concrete Stains
By Stephanie Wallace
August 2021 – $250 Winner
Are you tired of the color of your already stained concrete and looking for a way to give it a fresh new look? Concrete stains can be a great option for changing the color of your concrete without having to completely resurface it. EasyTint solvent-based tinted sealer is a semi-transparent stain that can add a new color to your already stained concrete. It is easy to apply and clean up, and it can create a subtle, subdued color change. Keep in mind that EasyTint is a semi-transparent coat, so it will not cover the previous color like paint would do. It is important to test with trial kits to see what the color will look like depending on the original color of your concrete.
First, it’s important to prepare your concrete surface by cleaning it thoroughly and removing any dirt, debris, or loose particles. This will help the concrete stains adhere properly and give you the best possible results.
Once you’ve chosen your stains, it’s time to get to work. For detailed instructions on how to apply EasyTint solvent-based tinted sealer read below. In general, you’ll want to apply the stains in thin, even coats, using a roller or brush to ensure full coverage. You may need to apply multiple coats to achieve the desired color intensity.
After the stains have dried, you’ll want to protect your newly-colored concrete with a sealer. This will help to protect the concrete from wear and tear and extend the life of your color transformation. Again, follow the manufacturer’s instructions for applying the sealer, and allow it to dry fully before using the surface.
With a bit of prep work and some careful application, you can easily change the color of your already stained concrete with EasyTint solvent-based tinted sealer. Give it a try and give your concrete a fresh new look!
Transforming Chalky Pinkish Orange Concrete into a Rich Rusty Iron Color with EasyTint Tinted Sealer
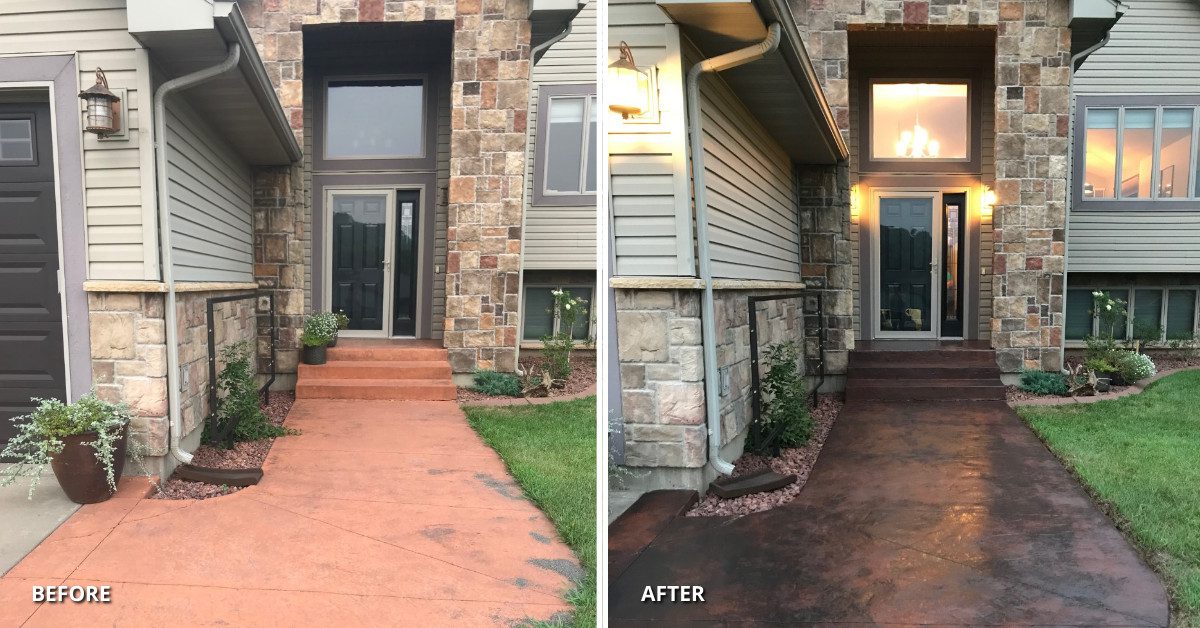
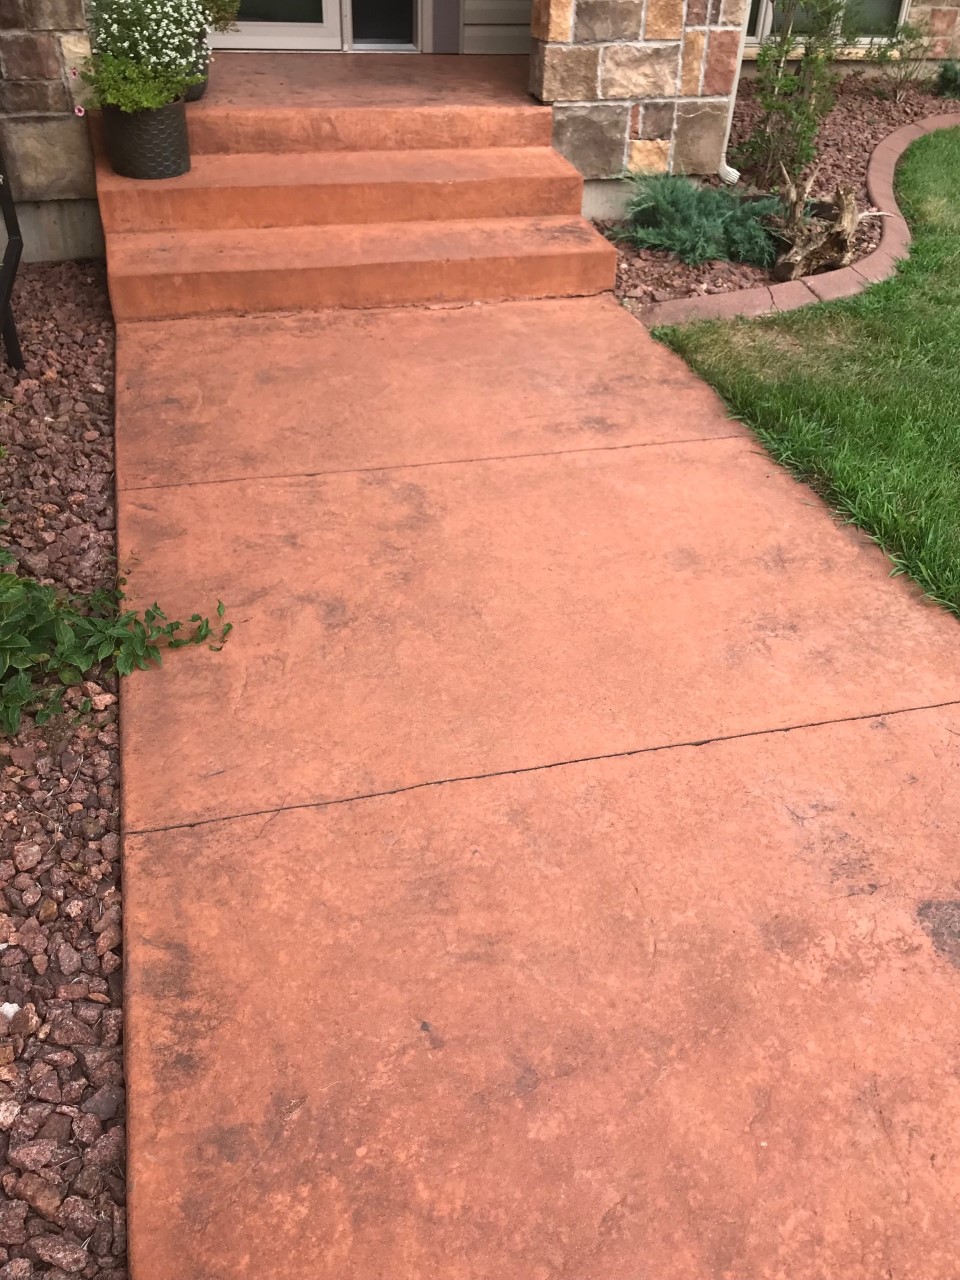
In this project, the homeowner wanted to change the color of their outdoor stamped concrete walkway and driveway edging, which was a bright pinkish orange color that they inherited when they purchased the house. They decided to use EasyTint solvent-based tinted sealer from Direct Colors to achieve the desired color of a rich rusty iron.
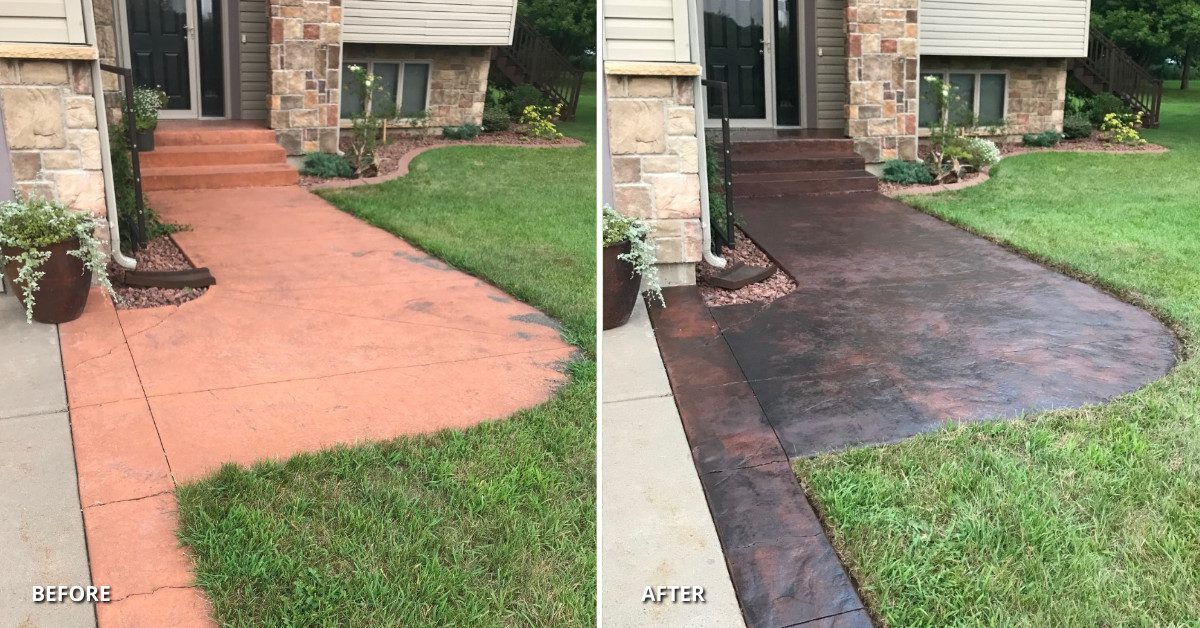
To prepare the surface for the EasyTint, the homeowner removed any paint or previously applied sealer using Soy Gel Stripper and cleaned the surface of any oils, dirt, debris, using a scrub brush and ProClean Degreaser™. They also verified that the concrete was absorbent enough by pouring a cup of water in various areas. If the water was not absorbed within five minutes, they etched the surface with CitrusEtch™ and rinsed it thoroughly. They allowed the concrete to dry completely before applying the EasyTint.
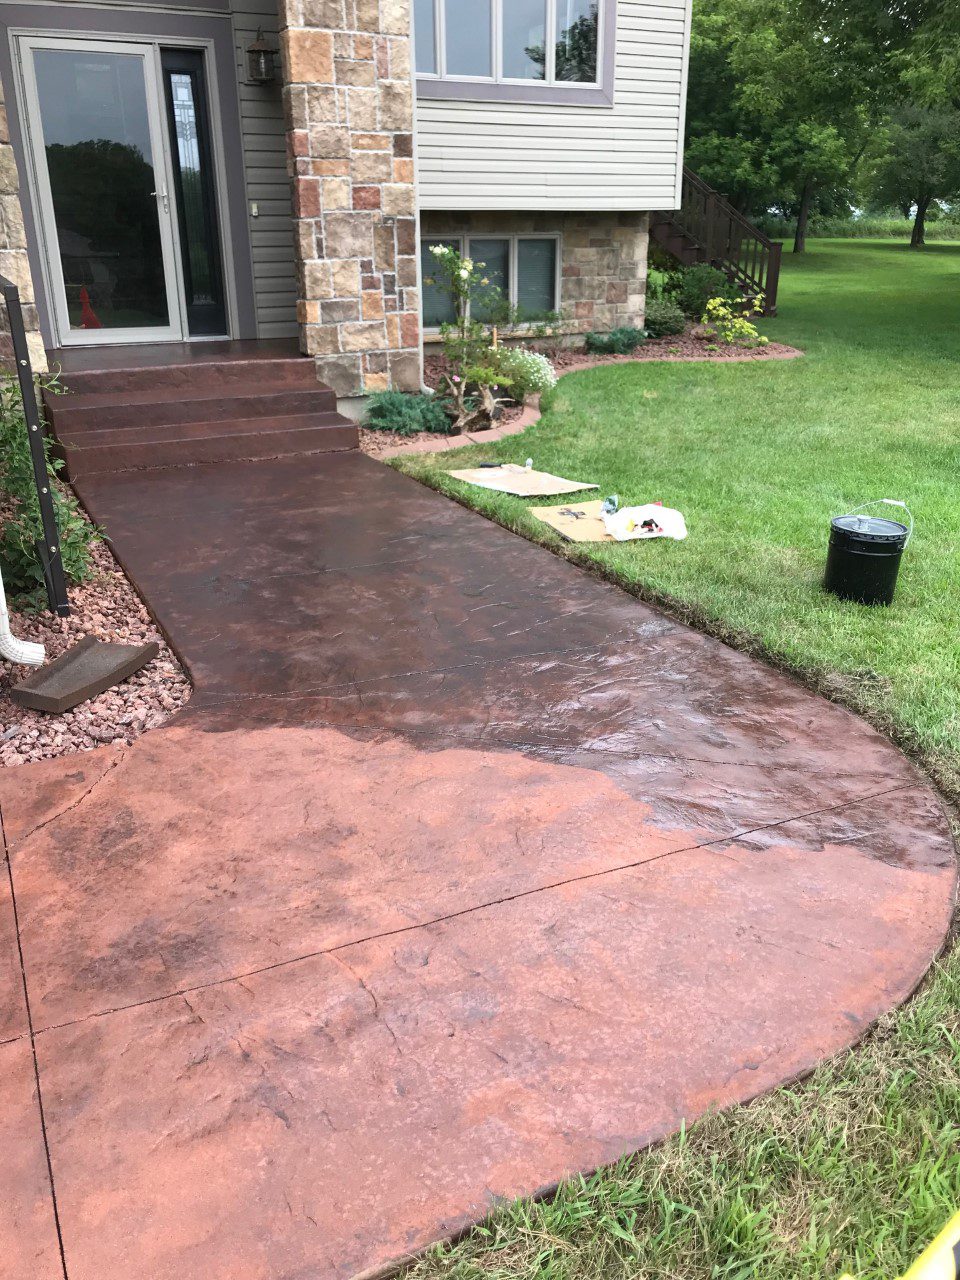
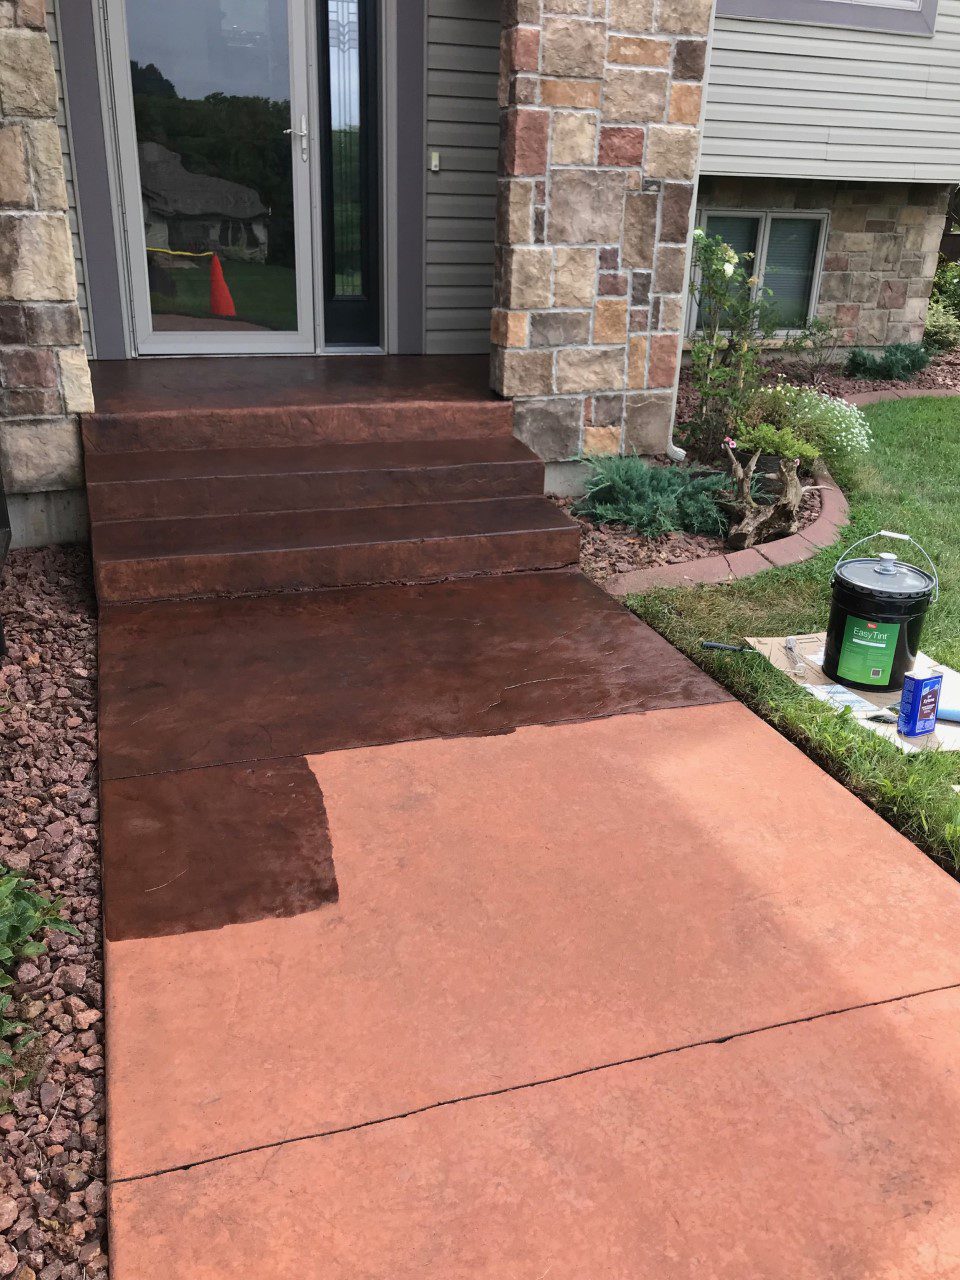
On the first day of the project, the homeowner applied two coats of the EasyTint using a 1/2″ nap roller, taking care to keep the coat even and covering each section completely. Despite the fast dry time, they did not experience any roller lines. They found the EasyTint to be easy to work with, as it is thin and will run into cracks and over edges. They applied a second coat of EasyTint the following day, again using a 1/2″ nap roller and ensuring that there was no puddling.
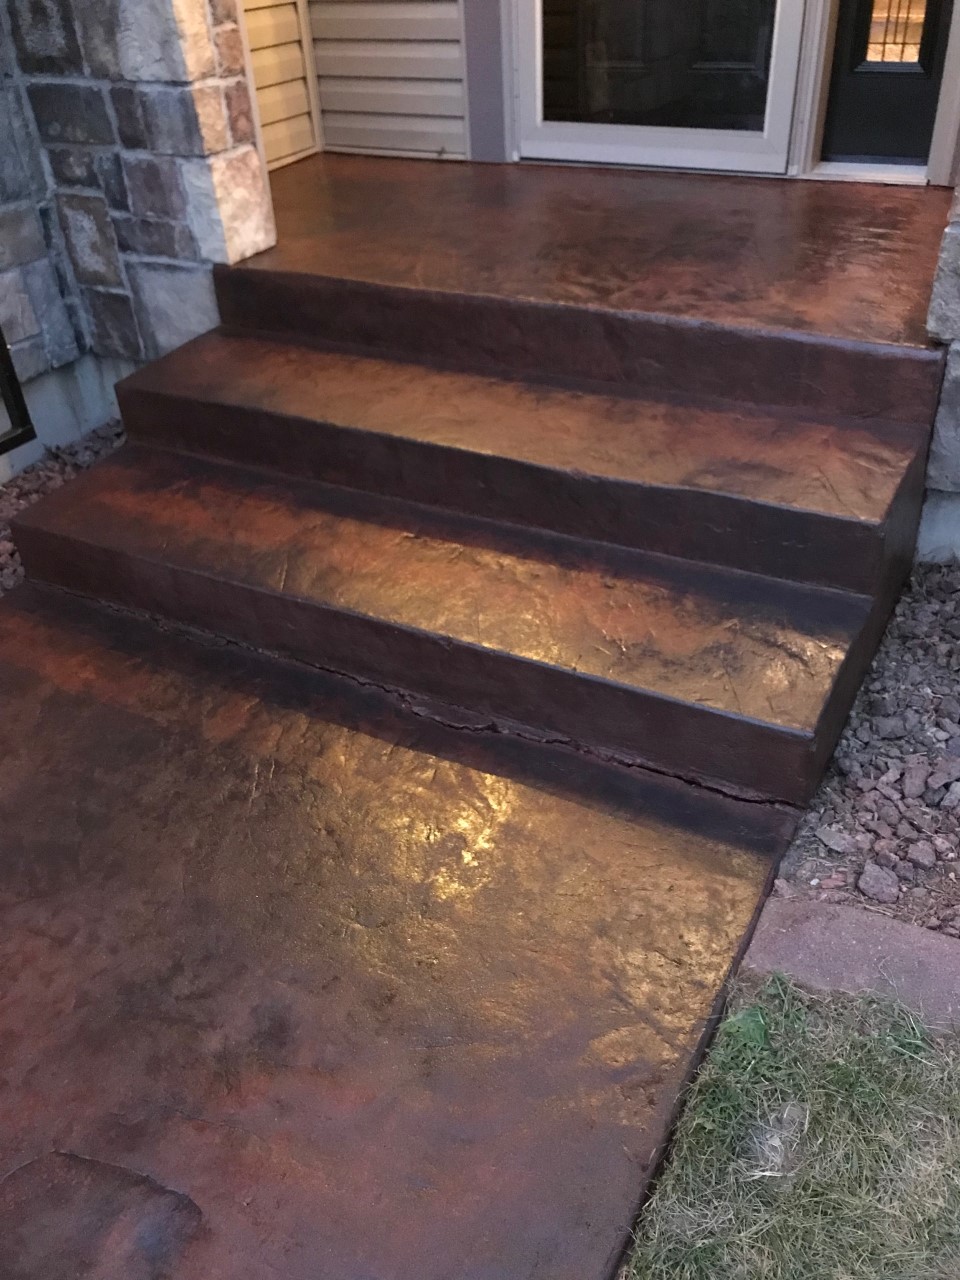
After the EasyTint had cured for eight hours, the homeowner applied one coat of EasySeal™ to protect the finish. They were extremely happy with the results, as the EasyTint transformed the chalky pinkish orange concrete into a rich rusty iron color that exceeded their expectations. They highly recommend these products and have provided some personal tips on their successful use.
Here are some tips for using EasyTint tinted sealer:
- Before starting the project, prepare the surface by edging the sod around it and pressure spraying the concrete.
- When applying the tinted sealer, use a 1/2″ nap roller, even though Direct Colors recommends a 3/8″ nap roller at most. This is because the extra thickness will help the sealer run into deeper wells in stamped concrete.
- Make sure to apply the sealer evenly and cover each section completely. If you’re worried about seeing roller lines due to the fast drying time, don’t be – there shouldn’t be any visible lines.
- When applying the sealer to edges, use a roller to squeeze it over them. Only hand paint a few sections that are deeper than others.
- Mix the tinted sealer by shaking and rolling it around on the ground before opening it. Shake it again before each pour.
- The tinted sealer should dry completely between coats, but it won’t be fully cured yet. It will be tough enough to walk on without leaving any footprints.
- On the second day, apply two coats of solvent-based acrylic satin concrete sealer using a 1/2″ nap roller and being careful to watch for puddling.
- For cleanup, use Xylene. You may need more tinted sealer and acrylic sealer than the recommended amount, depending on how thirsty your concrete is.
- The acrylic sealer will not only add protection, but also another layer of richness to the look of the concrete.
Follow these steps to successfully use EasyTint tinted sealer to change the color of your already stained concrete:
Step 1: Preparation
- Cover areas at risk of over-spray with plastic drop cloth.
- For existing concrete:
- Remove paint or previously applied sealer using Soy Gel Stripper.
- Remove any oils, dirt, debris, Soy Gel Stripper, or Bean-E-Doo® Mastic Remover using scrub brush and ProClean Degreaser™.
- Verify absorption by pouring a cup of water in various areas. If not absorbed within five minutes, etch the surface with CitrusEtch™, then neutralize surface with ProClean Neutralizer™ and rinse thoroughly.
- Allow the concrete to thoroughly dry before application.
Step 2: Application
- Shake EasyTint™ well before pouring into pump-up sprayer.
- Spray EasyTint™ on surface in slightly circular motions with irregular overlaps.
- Shake sprayer tank from side to side often to prevent color from settling.
- Spray thin coats to avoid puddling.
- Allow eight hours before applying second coat (maximum of two thin coats).
Step 3: Seal & Protect Finish
- Allow EasyTint™ to cure for eight hours and then apply one thin coat of EasySeal™.
Pro Tips:
- Begin spraying at a far corner to maintain a clear path to exit.
- If sealer is pooling or appears uneven, backroll with a 3/8th nap roller.
- Roller must be wetted in sealer with excess rung out before back rolling.
- To avoid droplets dripping onto surface: before releasing sprayer trigger, immediately place tip in a bucket.
- Cleanup: Uncured Sealer: Clean tools and supplies with Xylene. Cured Sealer: Clean tools and supplies with Soy Gel Stripper.
Step 4: Maintenance
- Protect finish every two years with EasySeal™ or as needed.
Tools & Supplies:
- Pump-up sprayer
- Plastic drop cloth
- Scrub brush


